2.3 Basic Operations for Course Categories
This chapter explains how to perform basic operations such as adding, editing, sorting, and deleting course categories on the "Manage Course Categories and Courses" page of the iLAP platform.
2.3.1 Accessing the Course Category Management Page
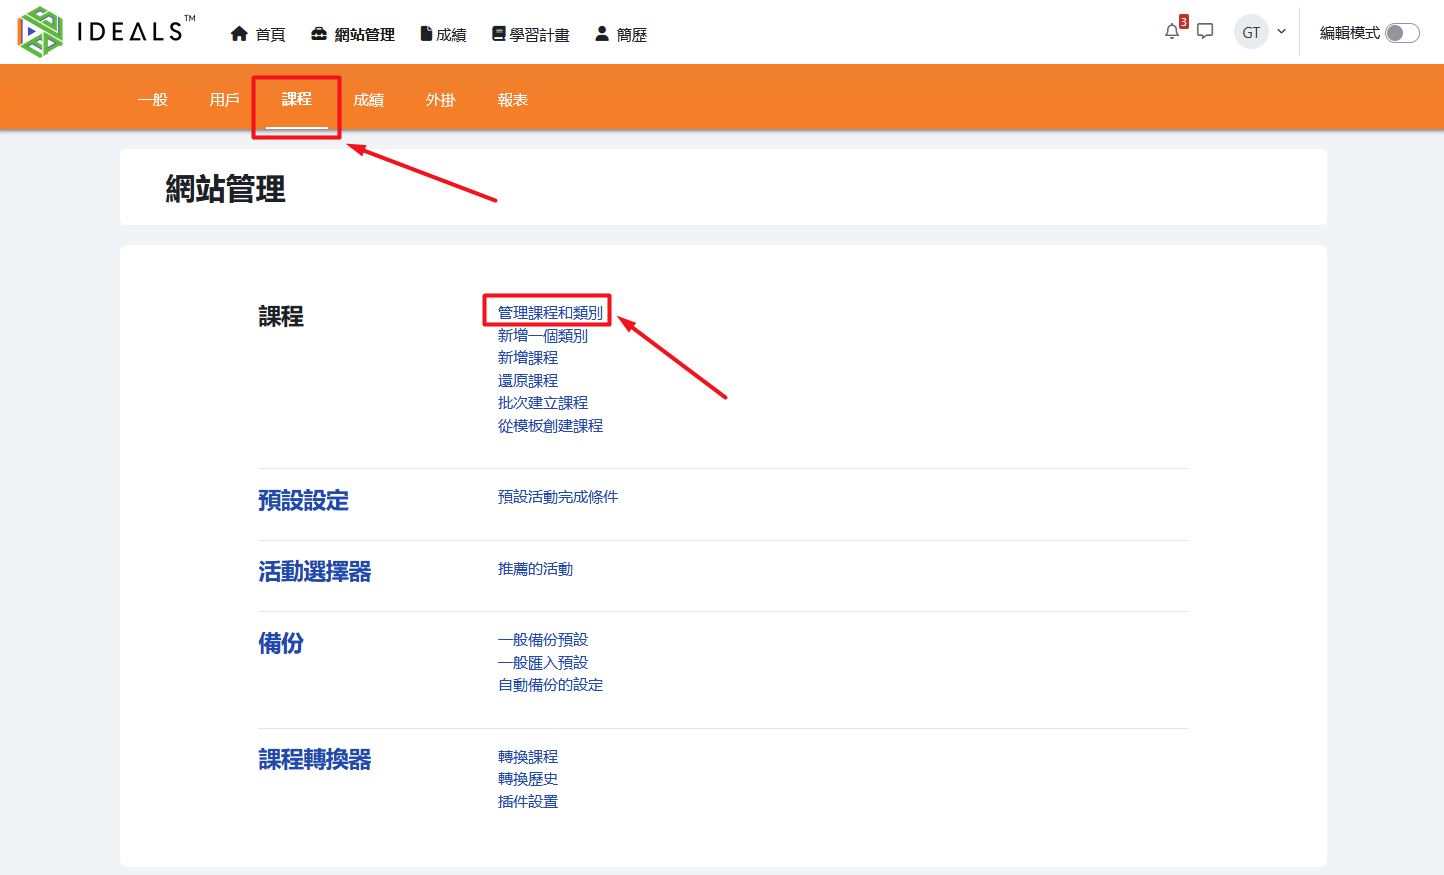
After logging in to iLAP, go to the homepage and click "Site Administration" in the main menu at the top of the page.

After entering "Site Administration" page, select the "Courses" tab, then click "Manage Courses and Categories."
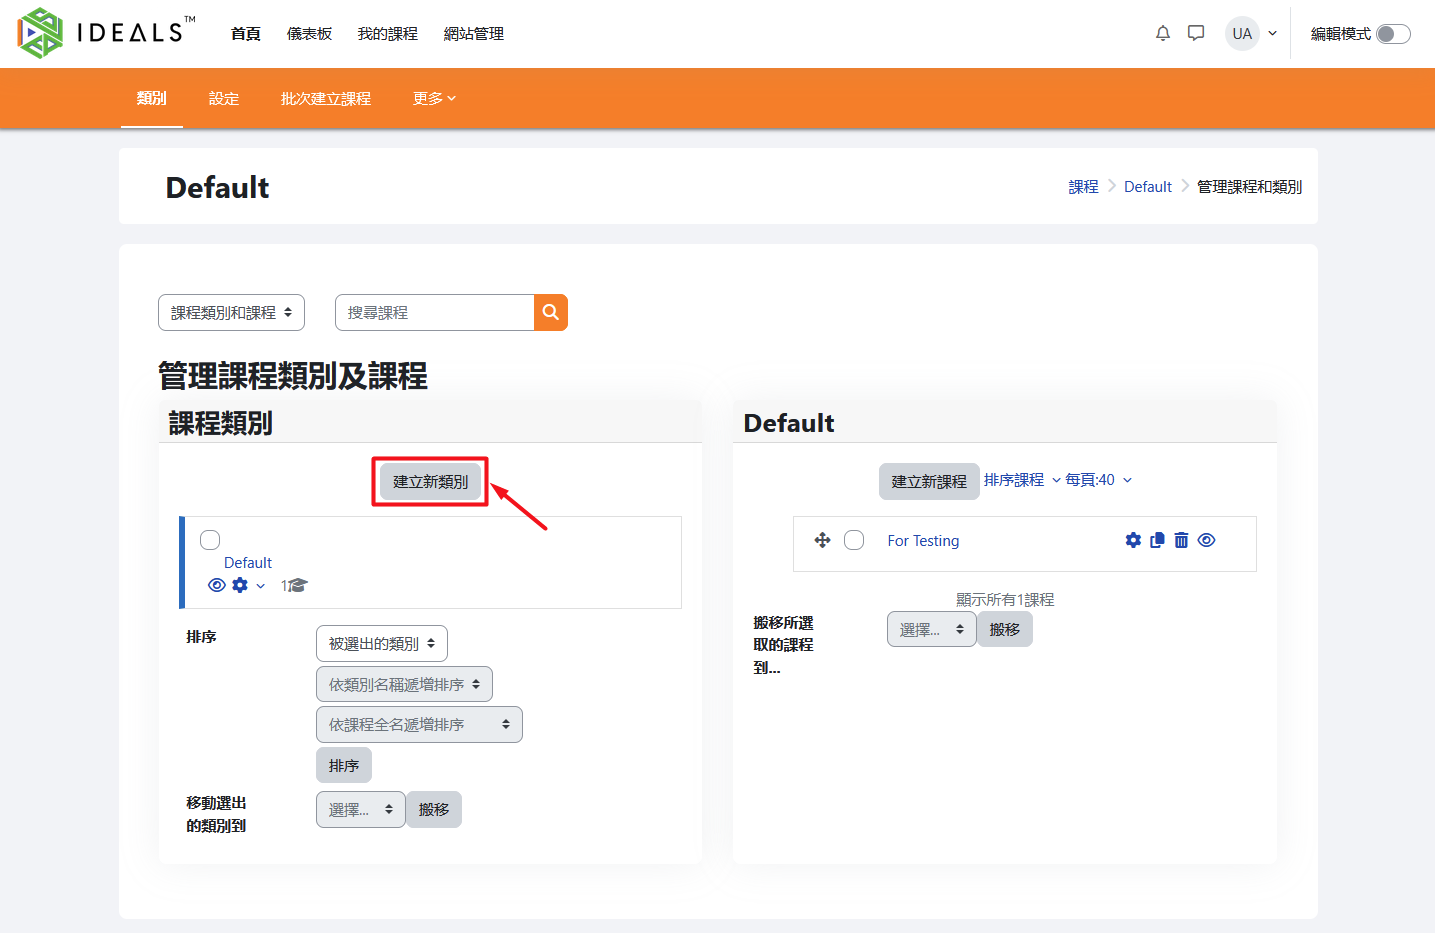
You will see a management interface as shown in the figure: on the left is the "Course Categories" tree structure, and on the right is the list of courses under the selected category.

2.3.2 Add a Course Category
In the "Course Categories" section on the left, click the "Create New Category" button.
When you first start using iLAP, there will only be one course category called "Default." You can edit or delete it as you wish.
Fill in the Course Category Information:
- "Parent Category": Select the parent category for this category (the default is "Default," meaning it will be placed under Default, but you can also choose another existing category or "Top").
- "Category Name": Enter the name of the new course category (e.g., "2024-2025 Academic Year" or "Mathematics").
- Other optional fields can be filled in as needed.
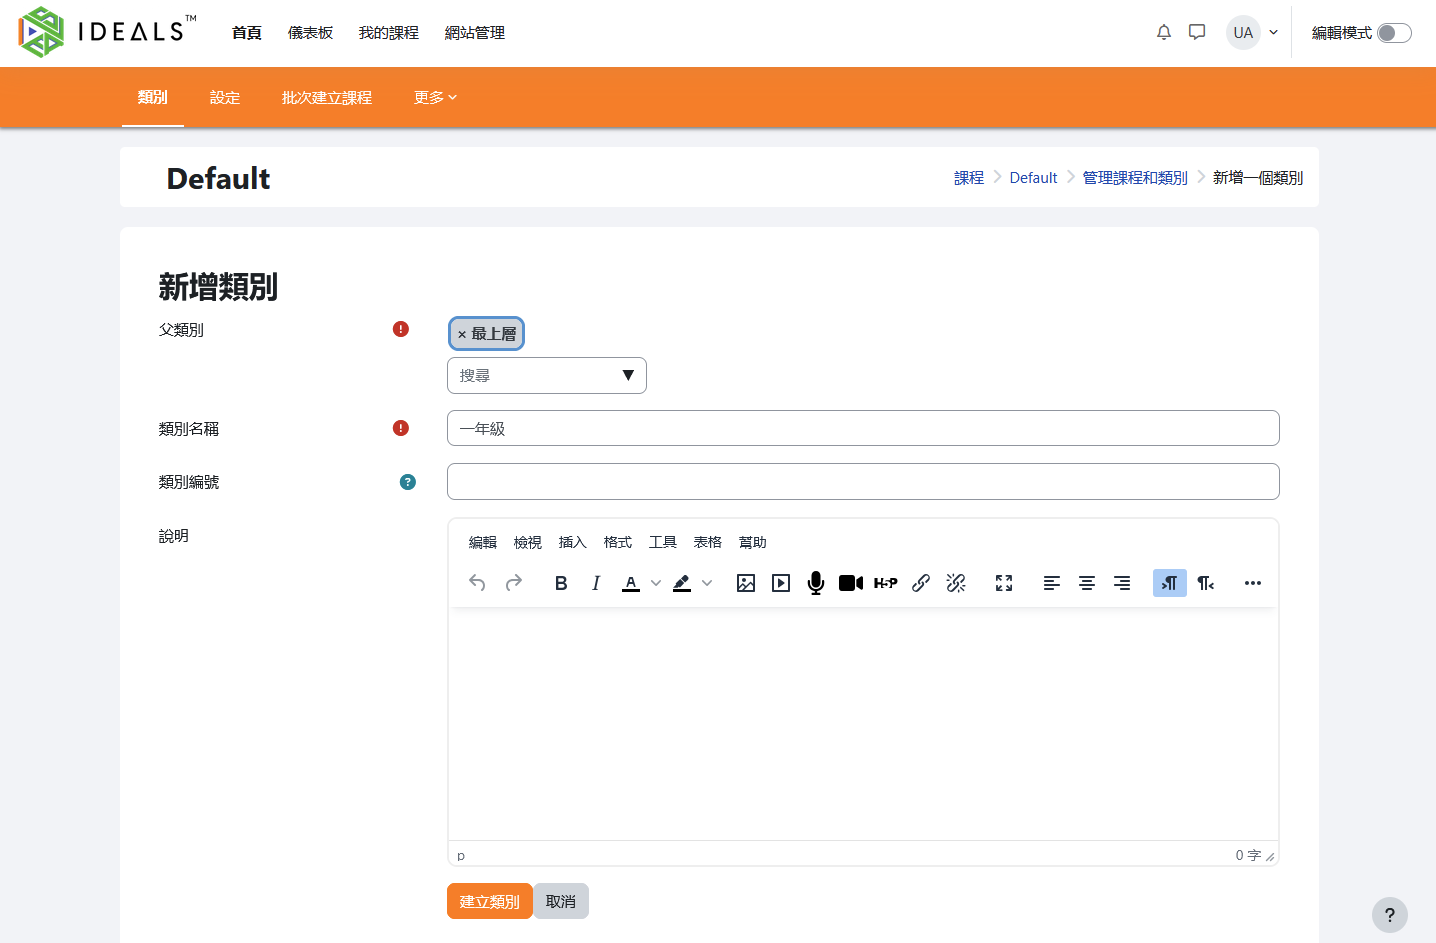
After completing the form, click the "Create Category" button.
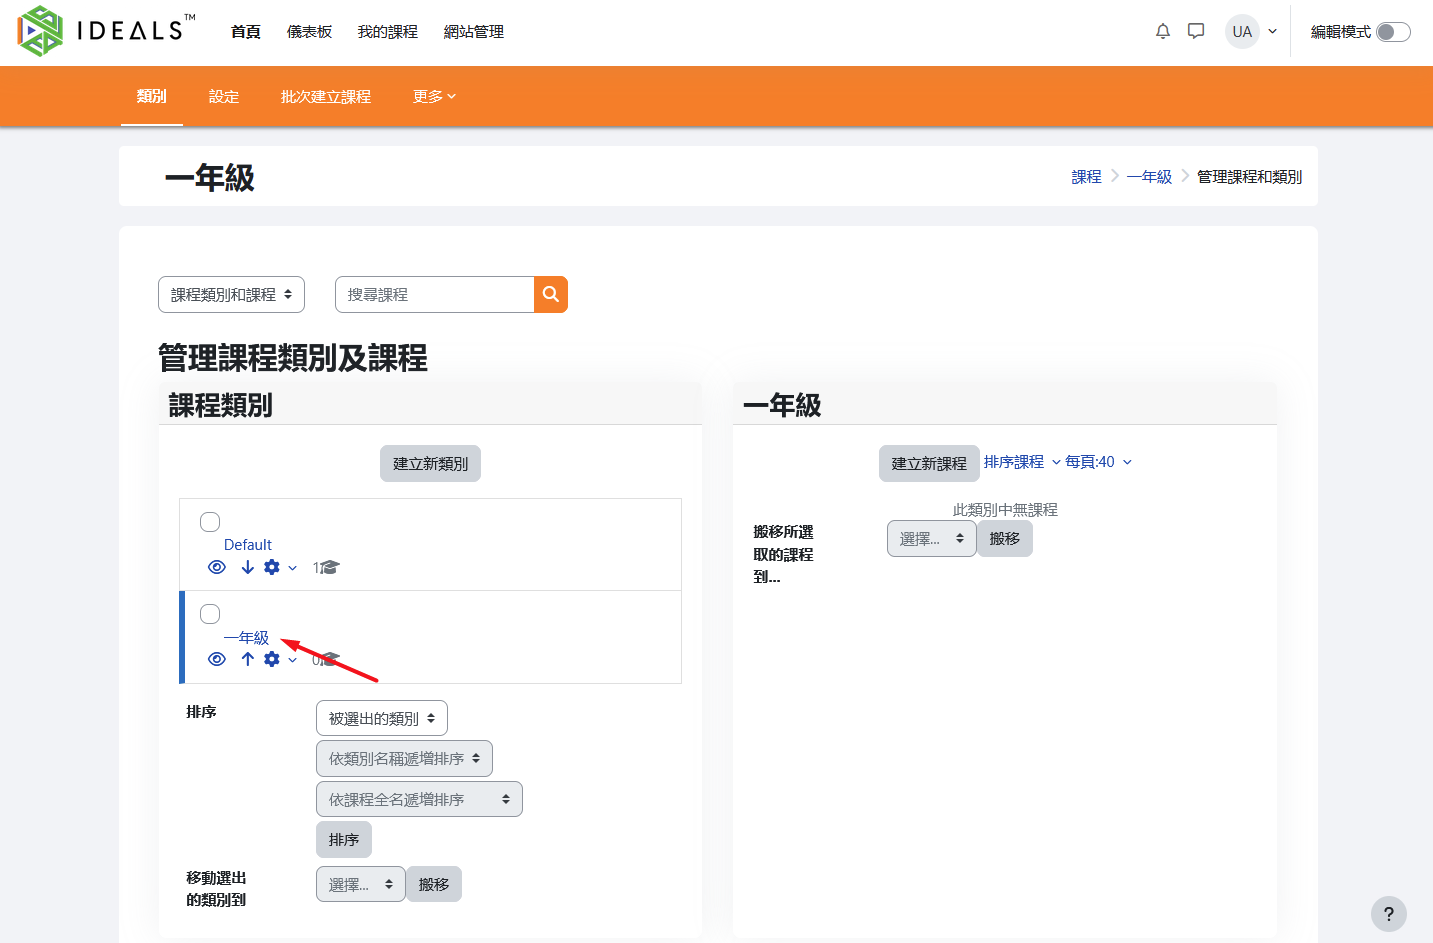
The newly added course category will be immediately displayed in the structure tree on the left.