
6.3.2 Creating Curriculum Components (CCs) Part 2
Reviewing and Revising the Existing CCs
2. Reviewing the CC Patterns and Task Patterns
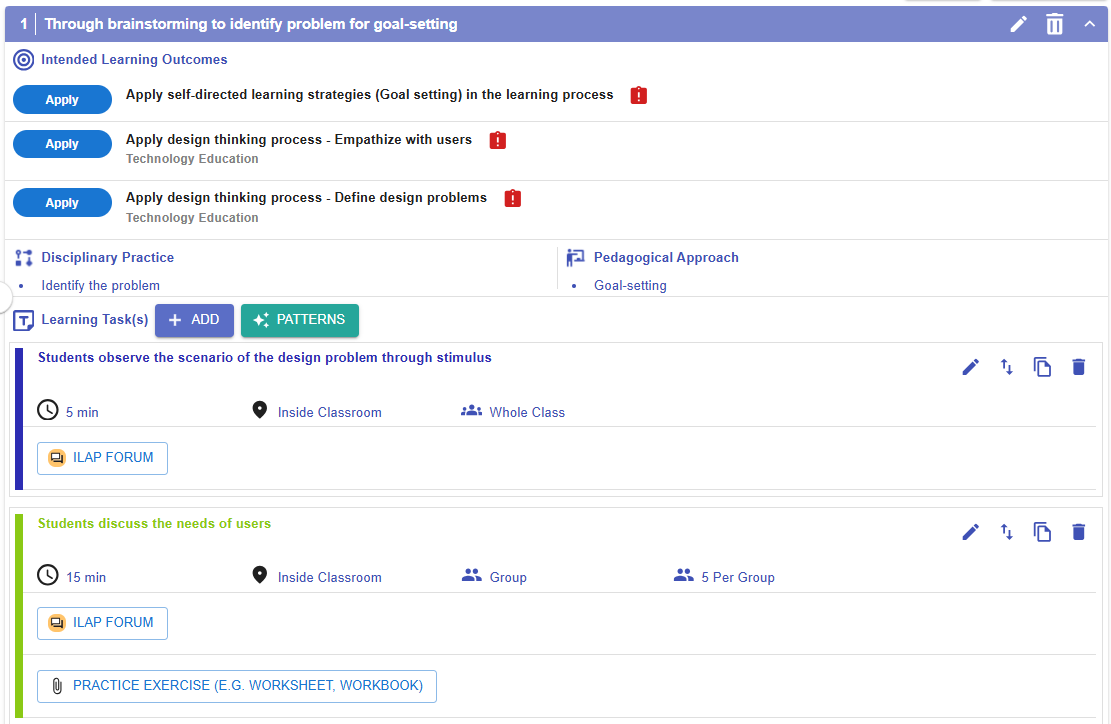
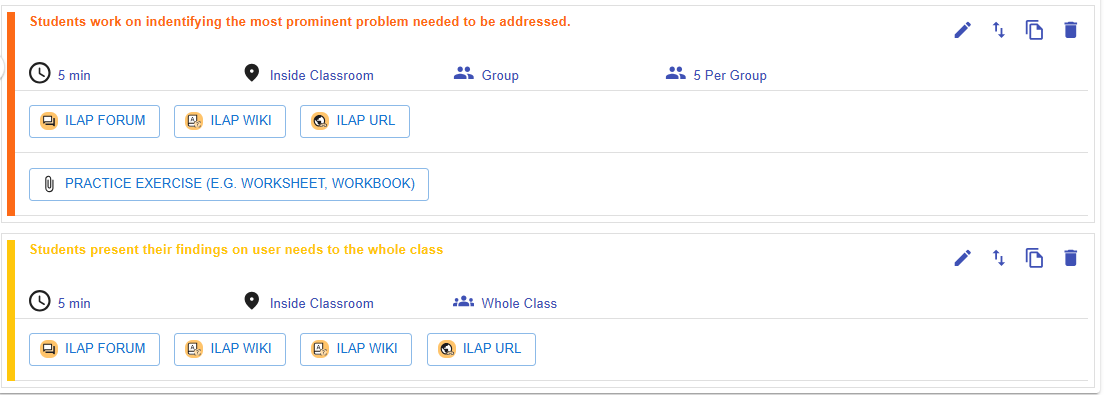
Figure 6.30: Example of a CC Pattern
| Name | Through brainstorming to identify problem for goal-setting |
| Intended Learning Outcomes |
|
|
Disciplinary Practice / Pedagogical Approach
|
Identify problem / Goal-setting |
| Learning Task(s) |
|
- This CC pattern has already provided the backbone of a CC. We now need to modify it to fit our own design by following these steps:
-
- Update the name of the CC to include the intended learning outcome: "Identify the unique needs and challenges of the elderly".
- Link the intended learning outcomes "Identify the unique needs and challenges of the elderly" to the CC.
- Edit and Add the learning task(s) to fit the design.
- Update the name of the CC to include the intended learning outcome: "Identify the unique needs and challenges of the elderly".
2.1 Editing a CC

Figure 6.21: Editing a CC
- By clicking the
 button, you can open the CC builder to update the CC details. Please refer to the introduction below for guidance on updating a CC.
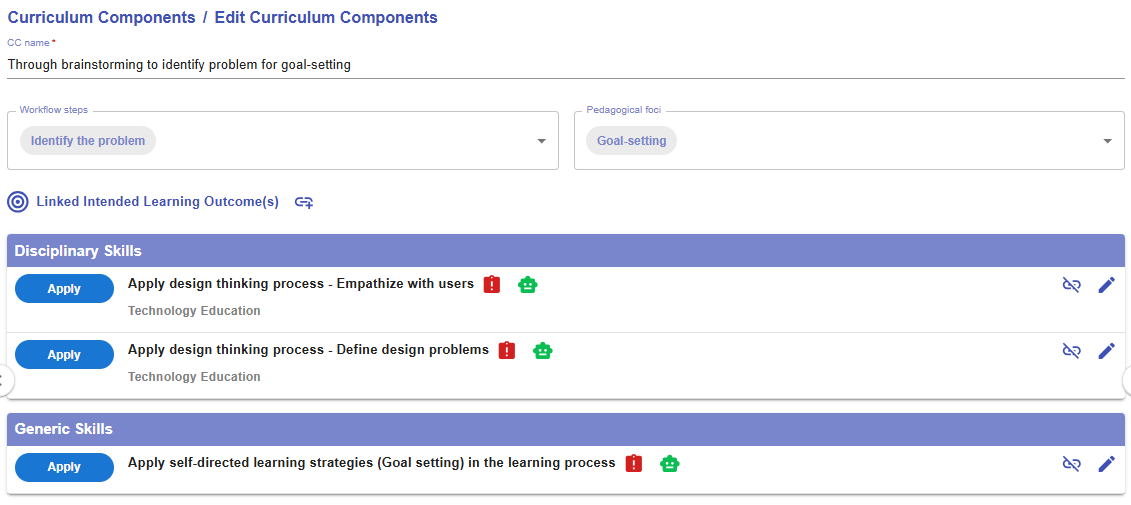 Figure 6.31: The Interface of CC Builder
|
1. CC Name
|
|
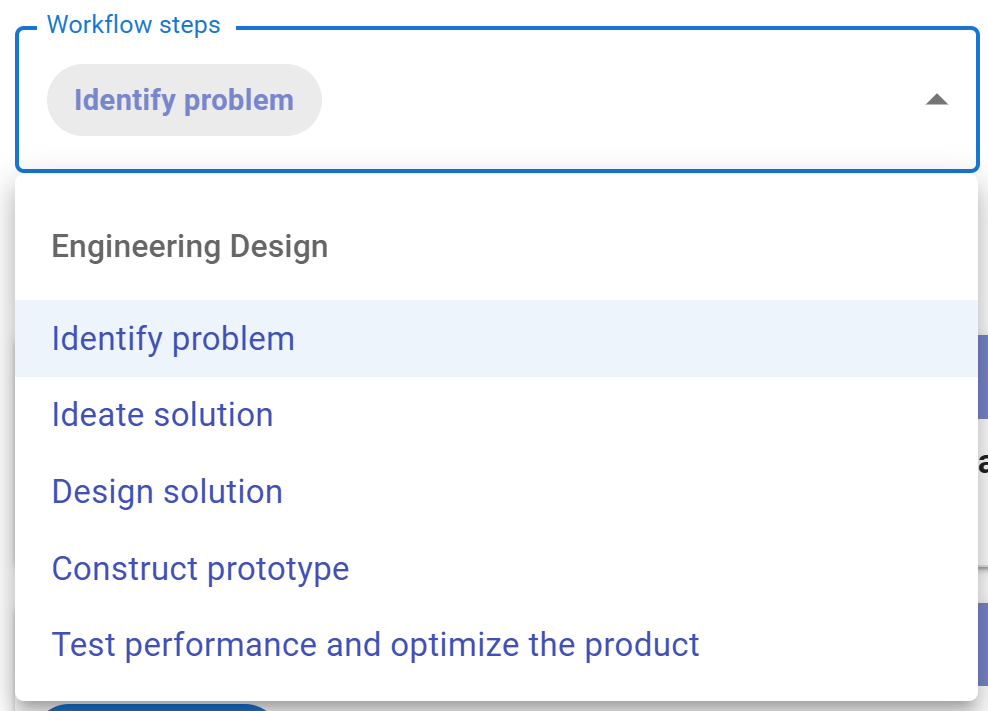
2. Workflow steps
Figure 6.32: The Workflow Steps of Engineering Design
|
|
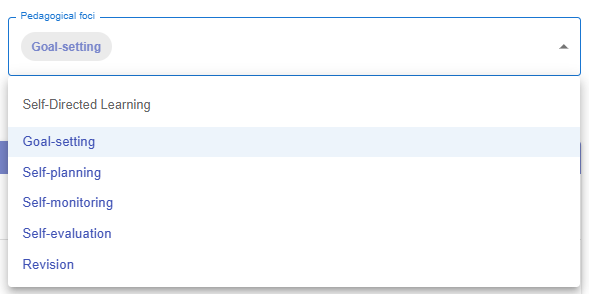
3. Pedagogical foci
Figure 6.33: The Pedagogical Foci of Self-directed Learning
|
|
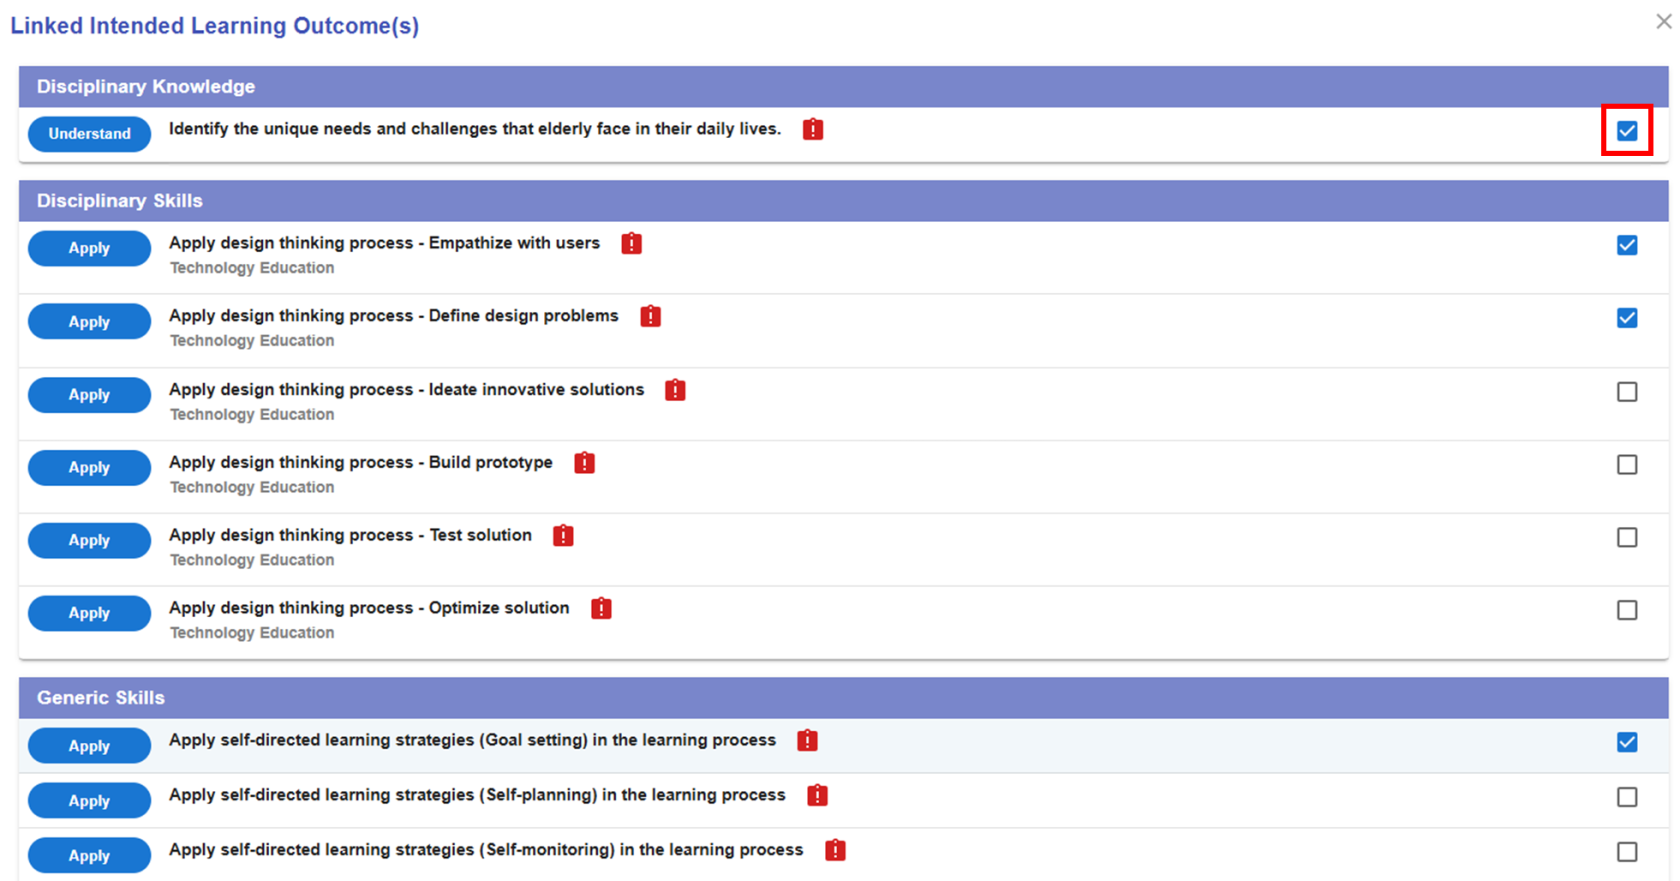
4. Linked Intended Learning Outcomes (ILOs)
4.1. The Link Button
4.2 Selecting the Appropriate ILOs
Figure 6.35: Linking the ILOs to a CC (2)
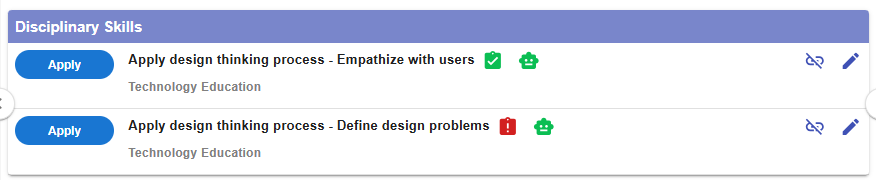
4.3 The Alert Icon and Complete Icon
Figure 6.36: Unassessed ILOs in a CC
4.4 The Unlink Button
Figure 6.37: Dissociating the ILOs from the CC
|


2.2 Updating the Tasks
- You can either add or edit tasks to fit your needs. There are two ways to add a new task: one is by 1) adding a new task from scratch, and the other is by 2) using task patterns. In this section, we will focus on how to use a task pattern to create a task.
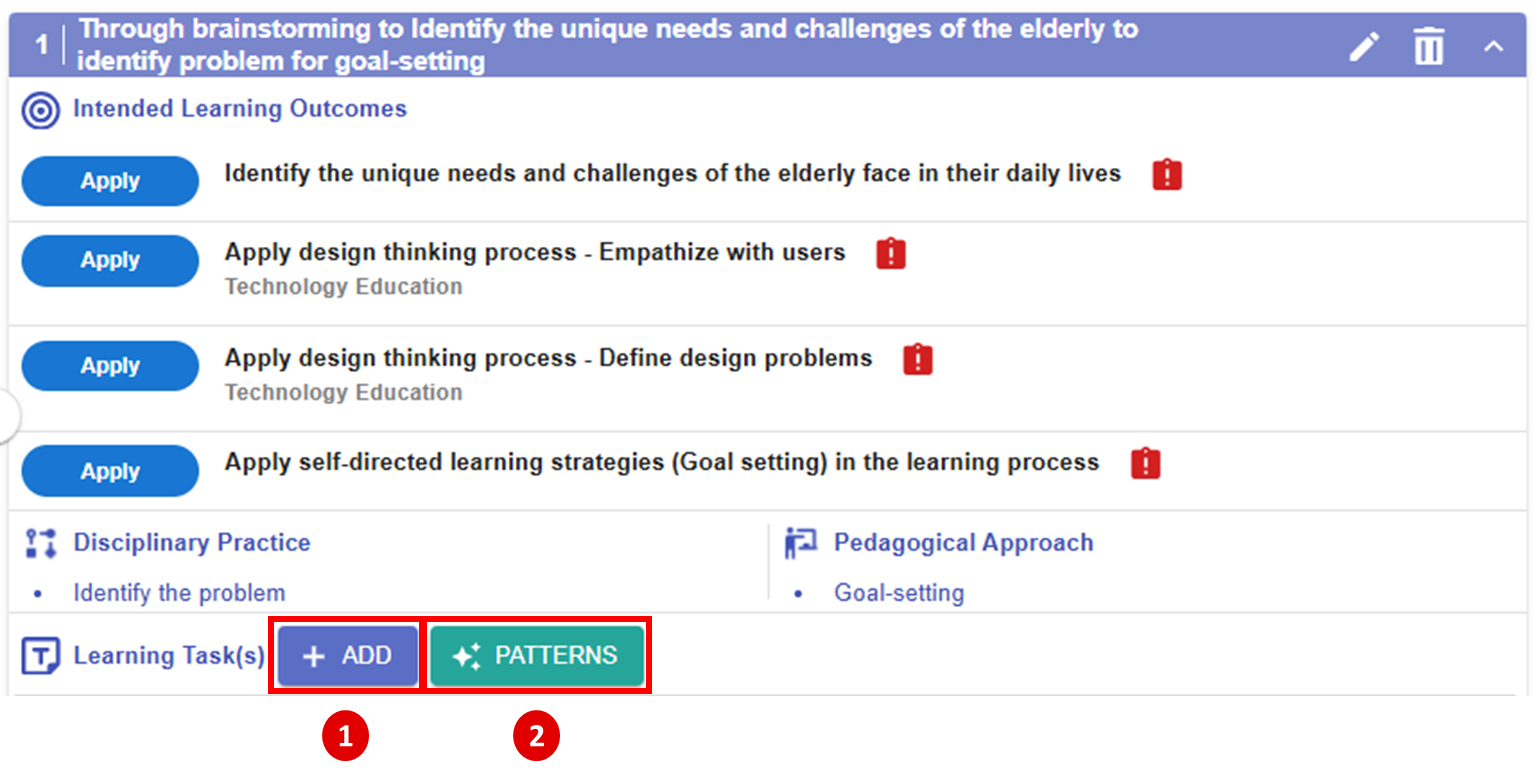
Figure 6.39: Adding a New Task with Task Patterns (1)
|
|
|
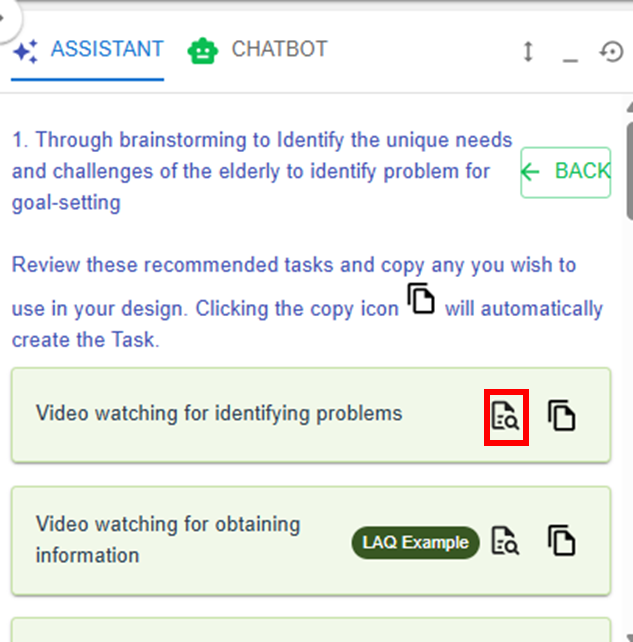
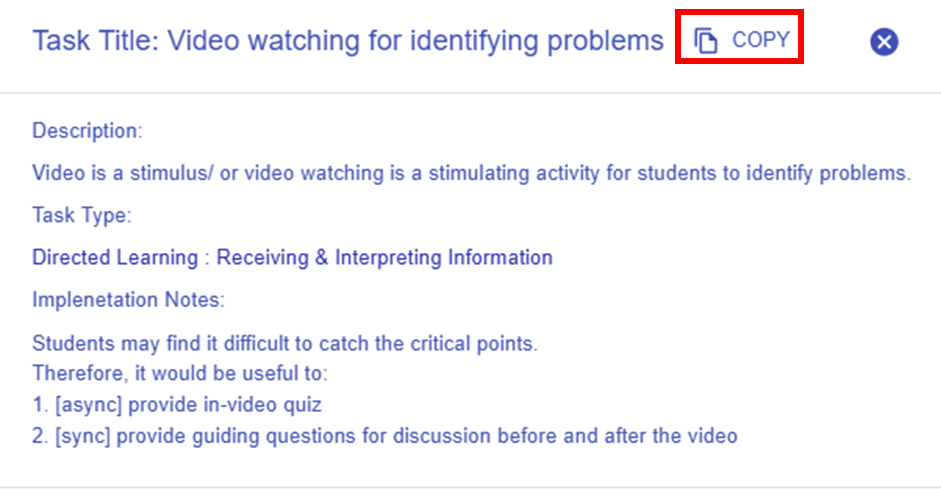
Figure 6.40: Adding a New Task with Task Patterns (2)
- By clicking the
 button, you can view a list of task patterns provided by the Learning Design Facilitator. These suggestions are based on your selected workflow step(s) from the disciplinary practice and the selected pedagogical foci from the pedagogical approach.
 - By clicking the
 button, you can explore the details of the targeted task pattern.
 - You can use the targeted task pattern directly by clicking "COPY" in the new pop-up window, or by clicking the
 button in the LDS Facilitator. The task pattern details will be auto-filled into the LDS.
 Figure 6.41: A Newly Added Task Using Task Pattern
- The newly added task will appear at the bottom of the CC. You can click the
 button to edit the task details. We will explore the task builder together using this example.
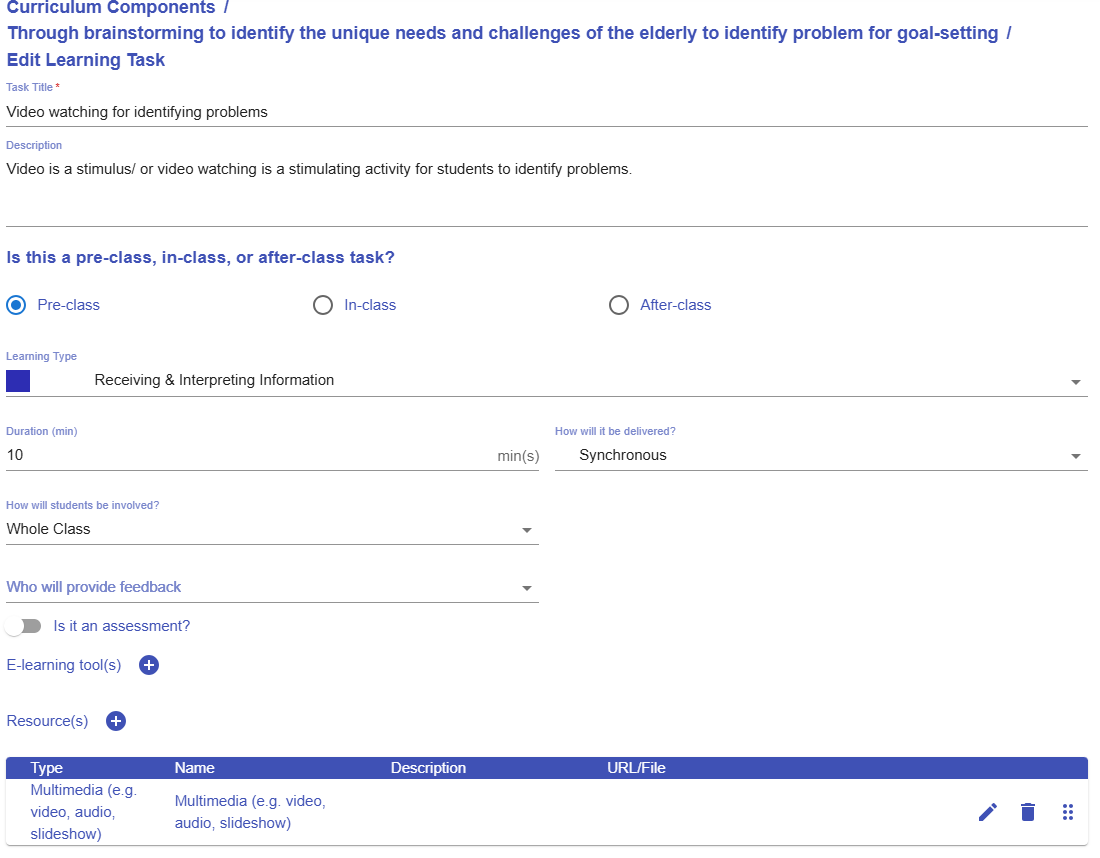
Figure 6.42: Interface of the Task Builder
- Please read the introduction below to guide you in setting up a task.
|
Item |
Example |
|---|---|
|
1. Task Information
Figure 6.43: Task Information |
Task title: Video watching for identifying problems
Description: Video is a stimulus/ or video watching is a stimulating activity for students to identify problems.
You may update the task information to make it more meaningful for the learning design.
Understanding Elderly Needs through Videos
Description: Students will watch video clips featuring elderly individuals to learn about the difficulties and expectations they encounter in daily life and complete the related worksheet. |
|
2. Stage
Figure 6.44: Stage |
Pre-class |
|
3. Learning Type
Figure 6.45: Learning Type
|
Receiving & Interpreting Information |
|
4. Duration
Figure 6.46: Duration |
10 mins |
|
5. Delivery Mode
Figure 6.47: Delivery Mode |
Synchronous |
|
6. Social Organization
Figure 6.48: Social Organization |
Whole Class |
|
7. Feedback Provider
Figure 6.49: Feedback Provider |
Teacher |
|
8. Assessment
Figure 6.50: Triggering the Assessment Option in a Task |
Each learning task can serve as both a learning activity and an assessment.
If you select the assessment option, you will need to assign the feedback provider(s) and specify the targeted learning outcomes for this task to be assessed.
|
|
9. E-learning Tool
Figure 6.51: Interface for Adding E-learning Tool(s) to a Task |
The e-learning tools section allows you to select the type of tool you want to use in the Learning Management System (iLAP) to implement the task.
For example, if you want to create an interactive video that both presents content and assesses student knowledge, you can choose the H5P tool, as demonstrated here. |
|
10. Resources
Figure 6.52: Interface for Adding Resource(s) to a Task |
The resources section allows you to select the type of resource or tool you want to use to support the learning process.
For example, the task pattern suggests you to use the Multimedia for this task.
|
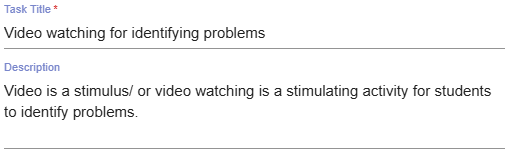


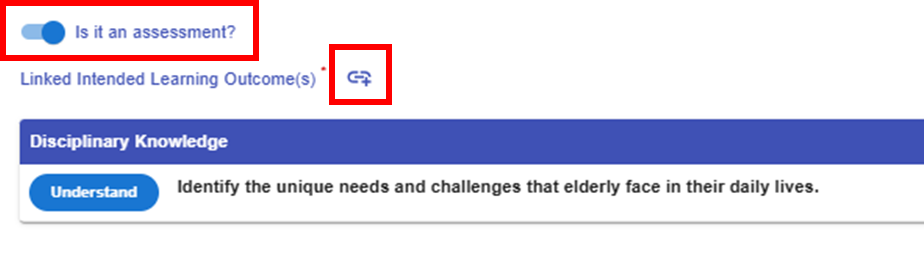
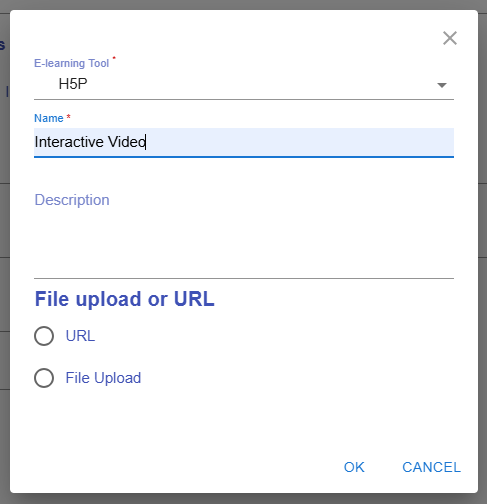

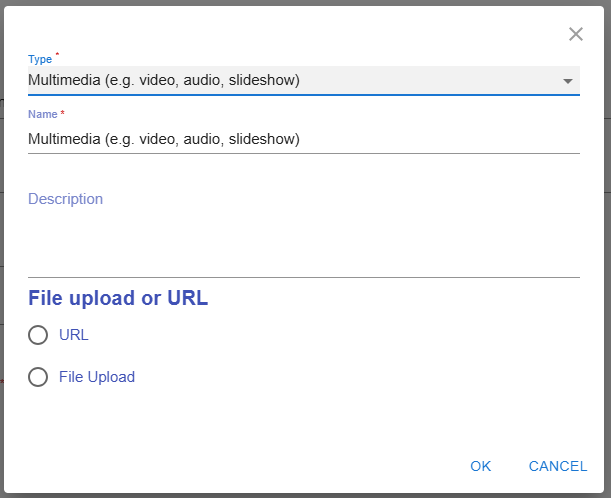
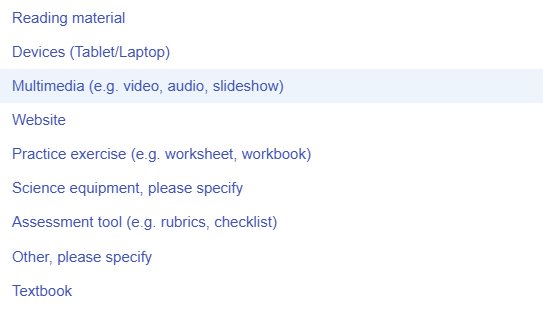
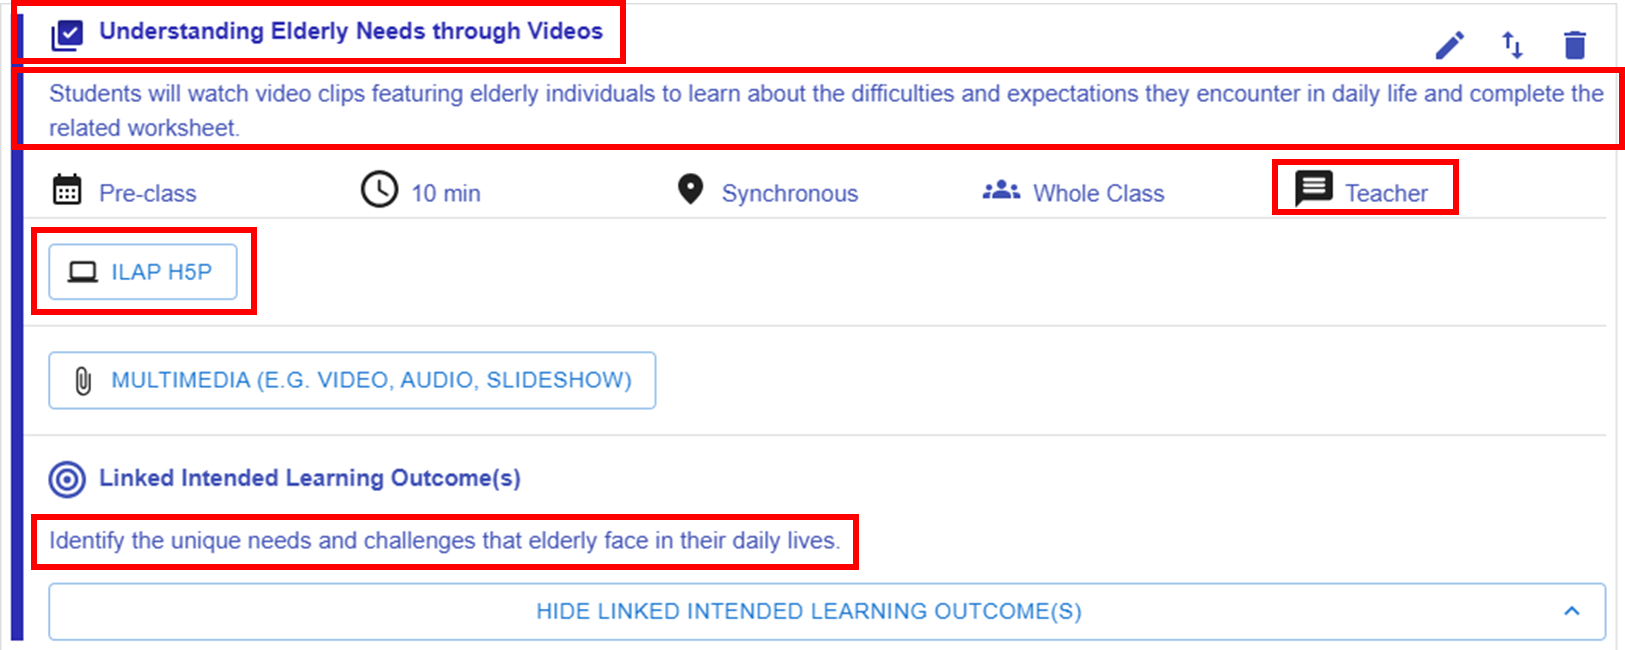
Figure 6.53: Preview of the Updated Task
-
You can see that the updates have taken effect in the task preview.
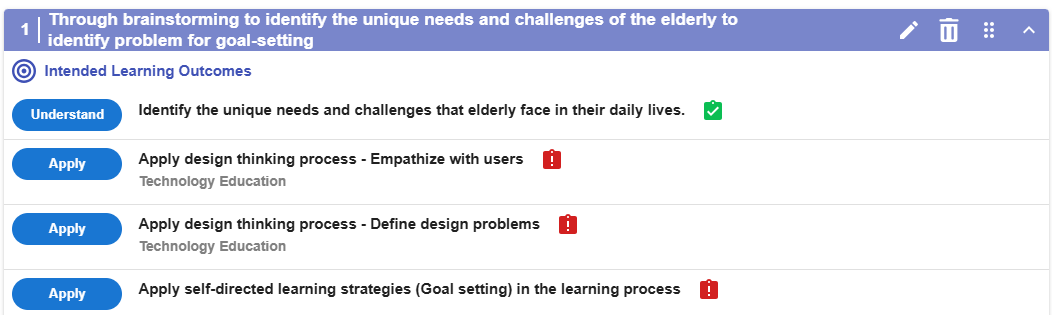
Figure 6.54: Preview of the CC
- The LDS will remind you to assign assessments to any learning outcomes within a specific CC that have not yet been assessed.
- After an assessment is assigned to a specific learning outcome, the alert icon
 will change to complete icon
  .
. - * Please remember to ensure that all linked intended learning outcomes are assessed in each curriculum component.
2.3 Moving a Task
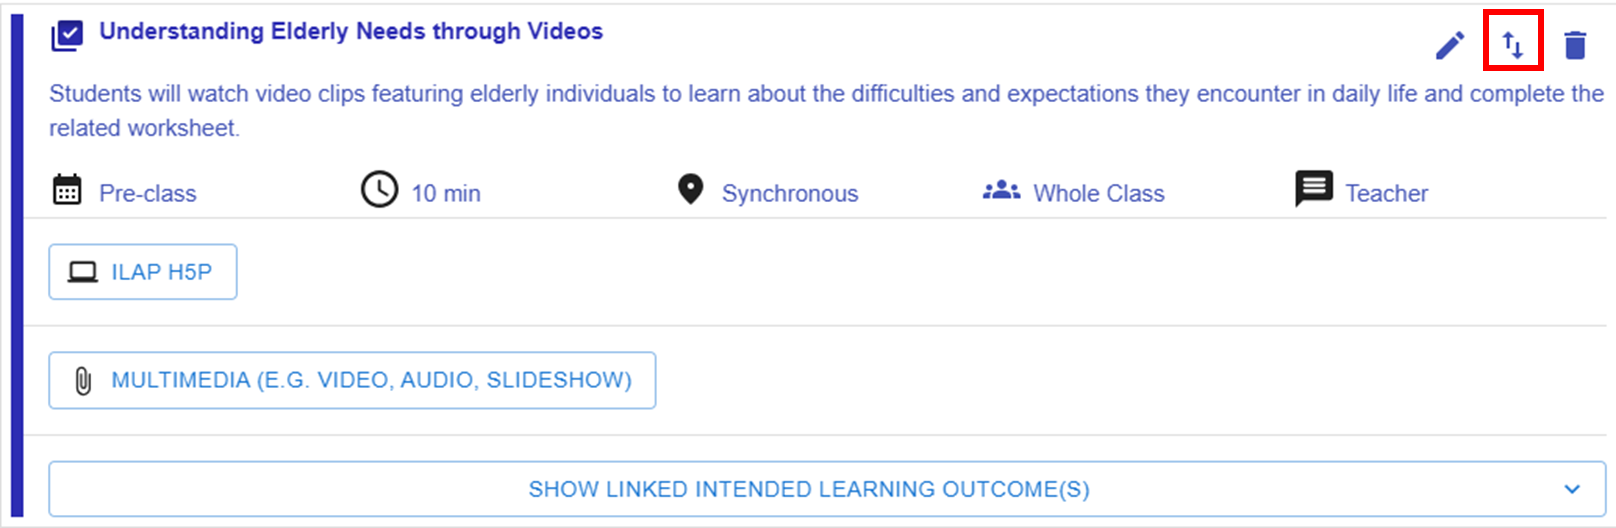
Figure 6.55: Moving a Task (1)
- By clicking the
 button, you will see a list of tasks for each CC.
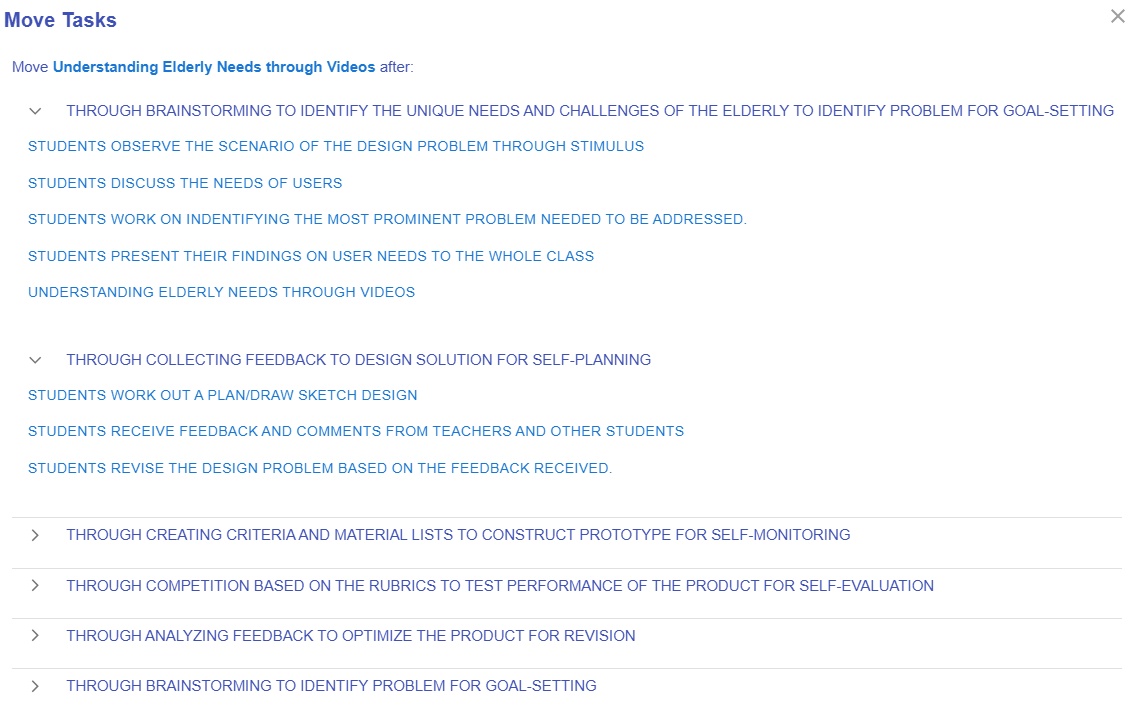
Figure 6.56: Moving a Task (2)
-
You can click any of the tasks to reallocate the current task to a position after it.