
6.2.1 Intended Learning Outcomes (ILOs)
By using the course-level pattern, the Learning Design Studio (LDS) has already provided some Intended Learning Outcomes (ILOs) based on the suggested disciplinary practice, Engineering Design, and the pedagogical approach, Self-directed Learning, as shown below:
Disciplinary Skills
- Apply design thinking process - Empathize with users
- Apply design thinking process - Define design problems
- Apply design thinking process - Ideate innovative solutions
- Apply design thinking process - Build prototype
- Apply design thinking process - Test solution
- Apply design thinking process - Optimize solution
Generic Skills
- Apply self-directed learning strategies (Goal-setting) in the learning process
- Apply self-directed learning strategies (Self-planning) in the learning process
- Apply self-directed learning strategies (Self-monitoring) in the learning process
- Apply self-directed learning strategies (Self-evaluation) in the learning process
- Apply self-directed learning strategies (Revision) in the learning process
However, you will still need to create customized ILOs to complete a meaningful learning design for your specific case.
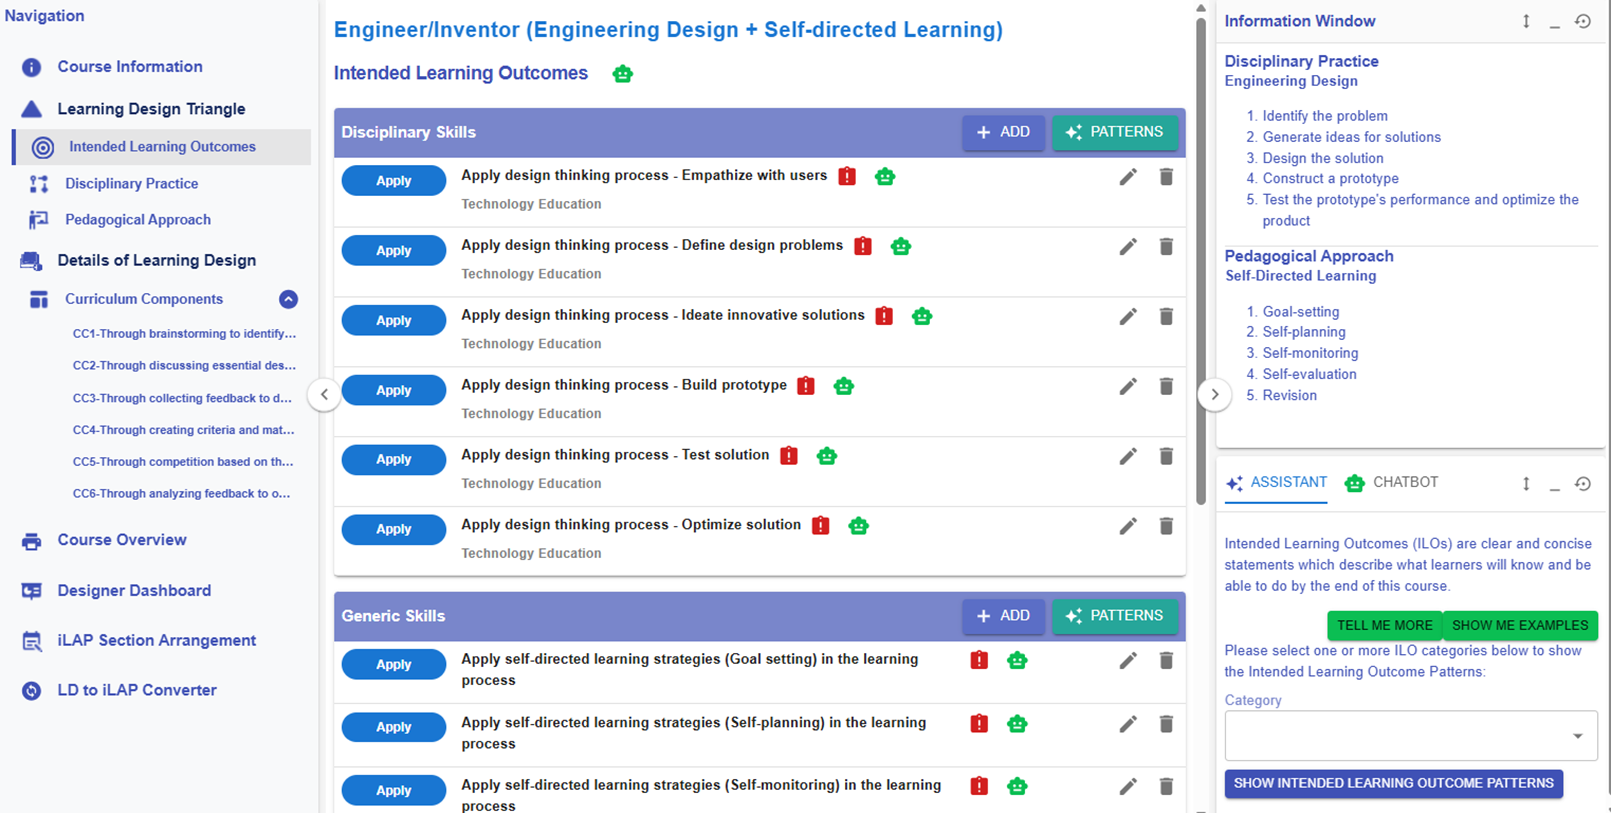
Figure 6.4: Learning Design Triangle Section - Intended Learning Outcomes
For the following part, you will explore how to add the new ILOs to the design.
🌟 For guidance on developing strong ILOs, refer to Chapter 2.2 - Intended Learning Outcomes (ILOs)
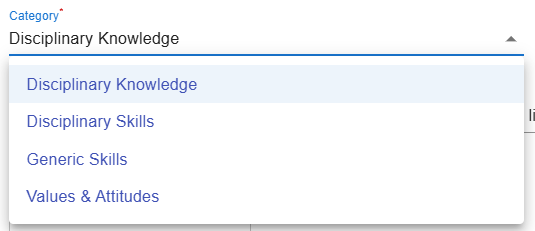
In the LDS, there are four categories of Intended Learning Outcomes (ILOs):
Disciplinary Knowledge: The core concepts, theories, facts, and frameworks that are recognized and developed within a particular field or area of study.
Disciplinary Skills: The specific techniques, methods, and competencies associated with a particular field or area of study.
Generic Skills: The broad abilities that help people succeed in education, work, and daily life, regardless of a particular field or area of study.
Values & Attitudes: The beliefs, principles, and dispositions that guide a person's behavior, decision-making, and interactions with others.
Adding a New ILO
There are two ways to add a new ILO: (1) using the ILO patterns or (2) writing it yourself.
1. Use the ILO Pattern
- You will use our pre-defined ILO pattern to indicate what students are expected to achieve as a result of the learning process.

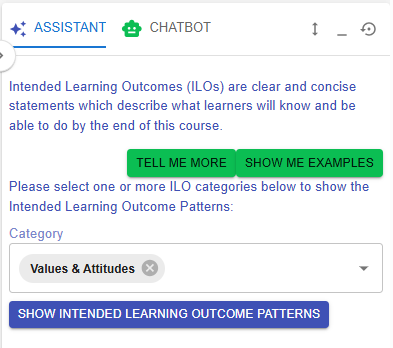
Figure 6.5: Intended Learning Outcomes - Values & Attitude
- Currently, the design does not have any ILOs created for Values & Attitude. We can select a ILO from the ILO patterns.
 |
 |
|
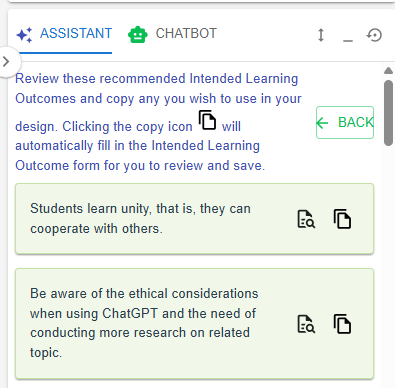
Figure 6.6: The ILOs Patterns in the LDS Facilitator
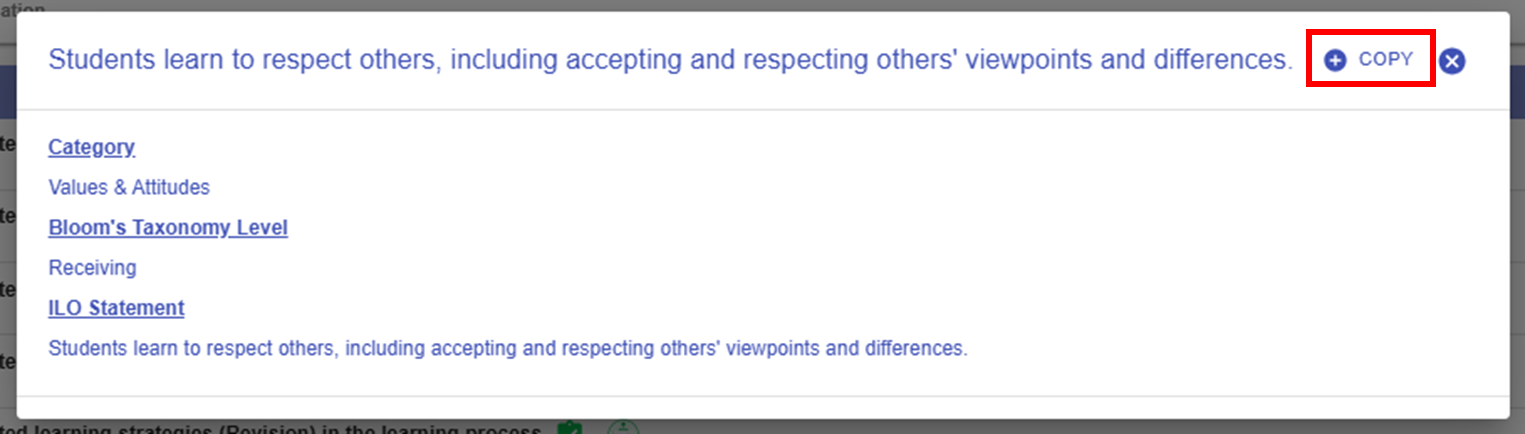
Figure 6.7: Details of the Targeted ILO Pattern (1)
|
|

2. Writing it Yourself
- You will write a full ILO to indicate what students are expected to achieve as a result of the learning process.

Figure 6.9: Adding a New ILO
- If you have not added any ILOs before, you can click the
 or
or  button to add a new ILO.
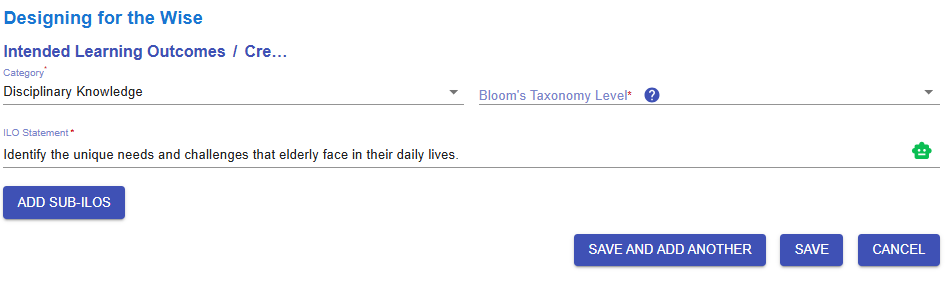
Figure 6.10: Interface of the ILO Builder (1)
- We will go through each option in the ILO Builder one by one.
|
1. Subject/Discipline(s)
Figure 6.11: Interface of the ILO Builder (2)
|
|
2. Category
Figure 6.12: Interface of the ILO Builder (3)
|
|
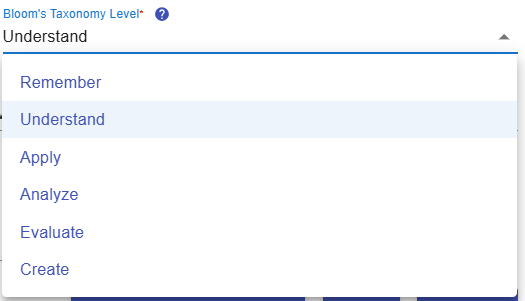
3. Bloom's Taxonomy Level
Figure 6.13: Interface of the ILO Builder (4)
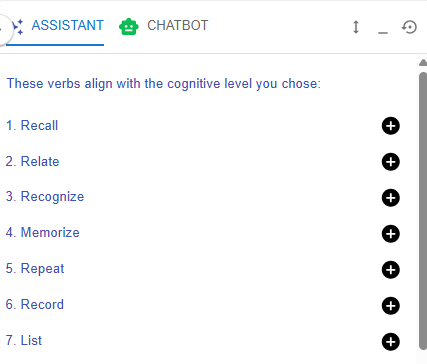 Figure 6.14: Writing a ILO with LDS Facilitator
|
|
4. ILO and LDS Facilitator
Figure 6.15: Interface of the ILO Builder (5)
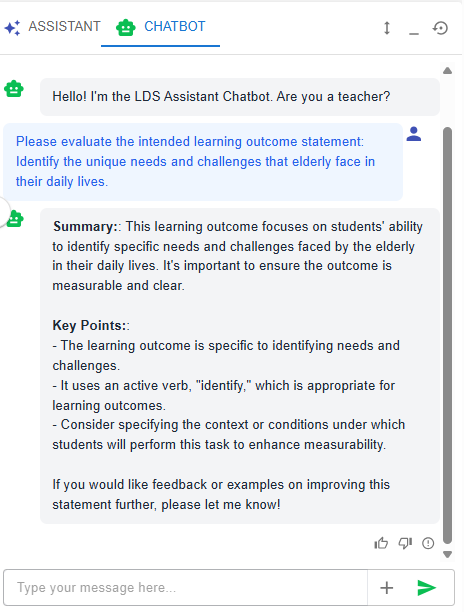
Figure 6.16: Writing a ILO with the Chatbot
|
|
5. Sub-ILO(s)
Figure 6.17: Interface of the ILO Builder (6)
To provide greater clarity, an ILO can be subdivided into more detailed sub-ILOs as needed. |


Additional Information
|
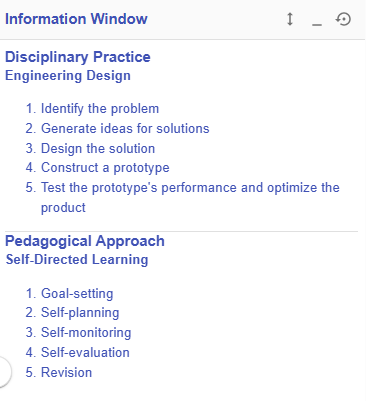
Information Window
Figure 6.18: Information Window |
The course-level pattern has already provided some information about the pedagogical approach and disciplinary practice. You can review these details in the information window. |
After completing this section, it is clear that the ILOs are well defined across Disciplinary Knowledge, Disciplinary Skills, Generic Skills, and Values & Attitudes. The intended cognitive and affective knowledge and skills will guide you in designing appropriate learning experiences later on.