3.1 Manual Enrolment
此方式比較適合個別指定學生加入課程,但你仍可選擇多過一位學生。This method is more suitable for enrolling individual students into a course, but you can still select more than one student at a time.
3.1.1 進入課程的「成員」頁面Go to the "Participants" page of the course
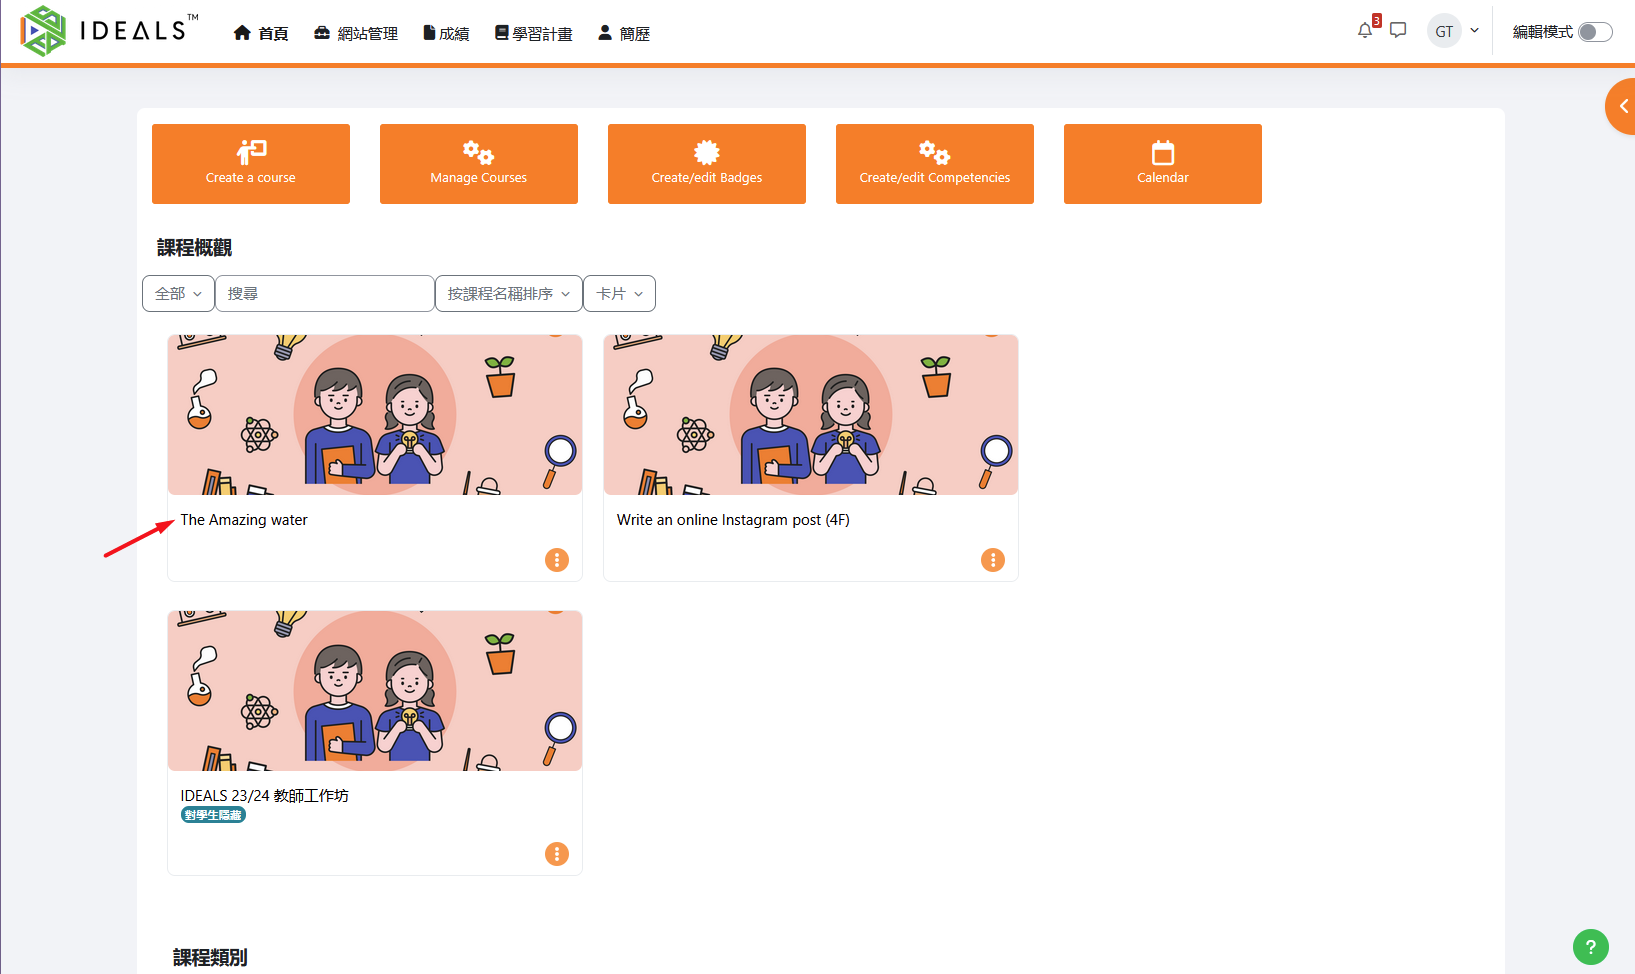
老師登入After logging in to the iLAP 首頁後,可直接在首頁的「我的課程」區域,或瀏覽課程類別清單,點擊進入一個目標課程。homepage, teachers can enter a target course either directly from the "My Courses" section on the homepage or by browsing the course categories list.
例如在下圖選擇這個課程:For example, in the image below, select this course:
在課程的選單中,點選「成員」,進入「已經選課的用戶」頁面。In the course menu, click on "Participants" to enter the "Enrolled users" page.
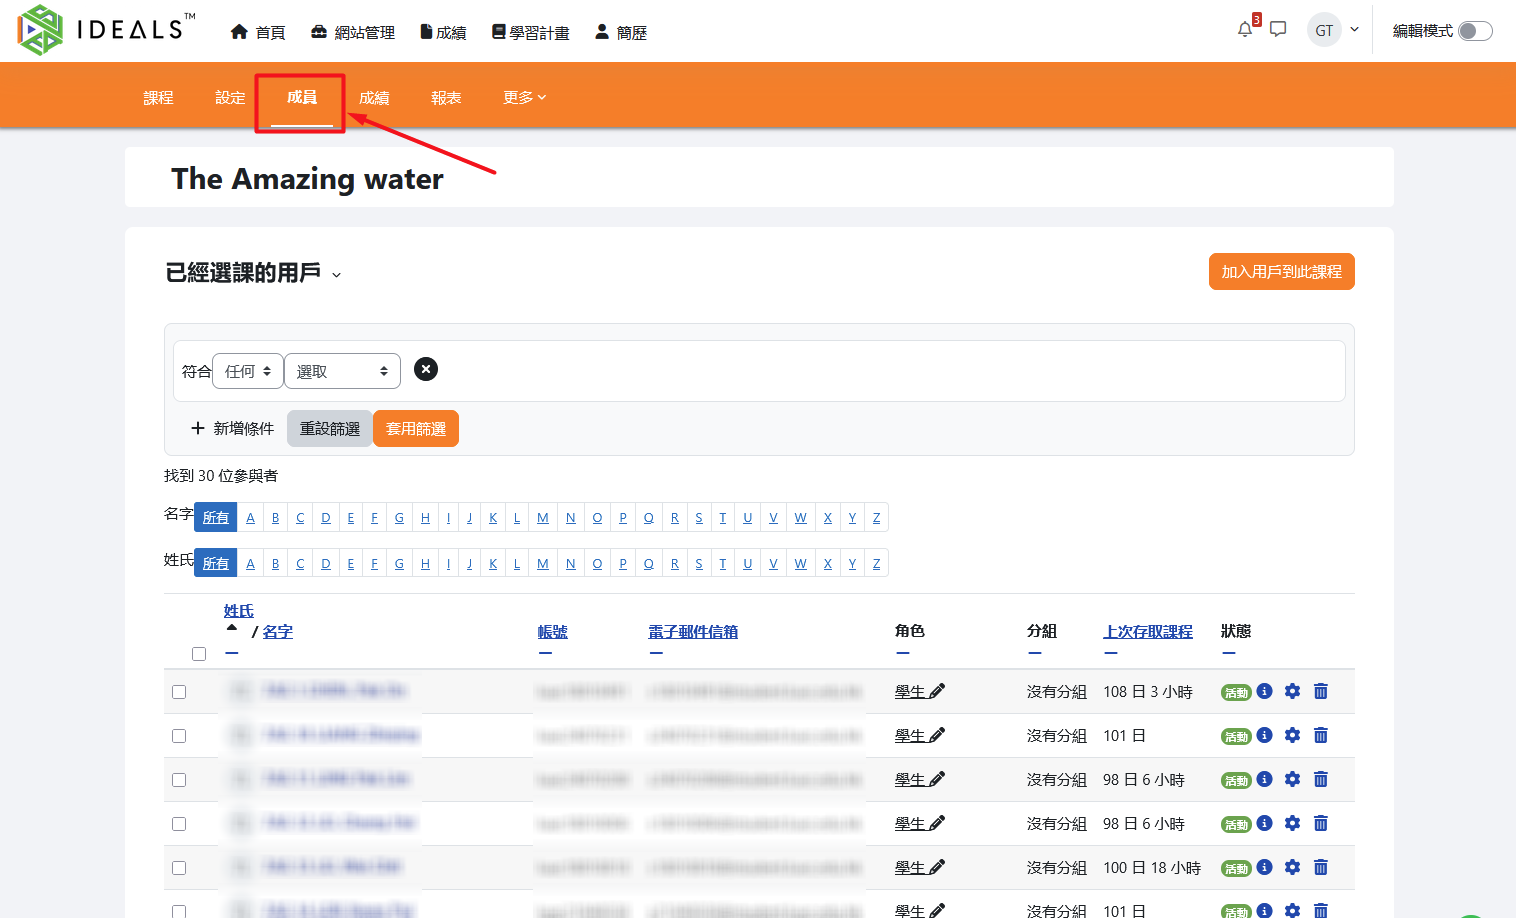
老師可用以下描述的兩種方法為學生手動選課。Teachers can manually enrol students using either of the two methods described below.
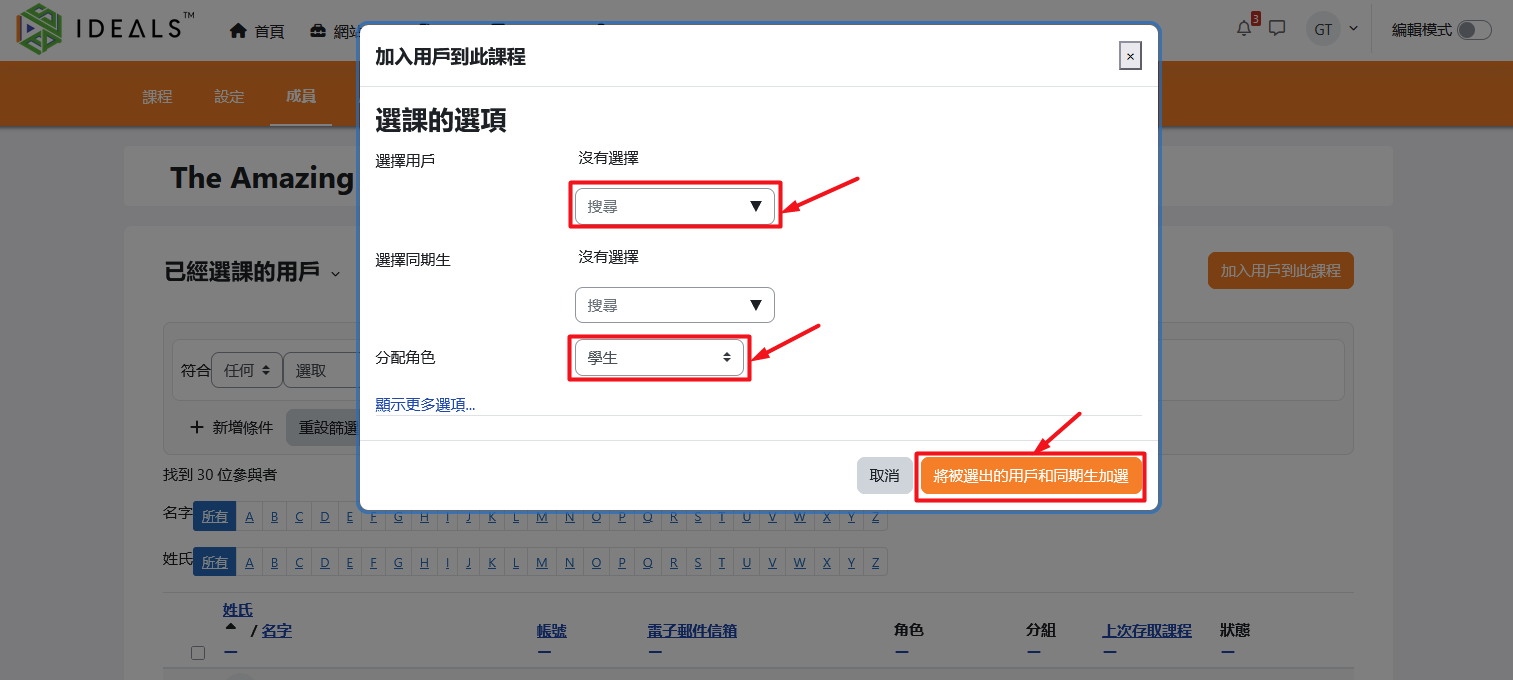
3.1.2 方法一:快速選課(「加入用戶到此課程」按鈕)Method 1: Quick Enrolment ("Enrol users" button)
在「已經選課的用戶」頁面,點擊「加入用戶到此課程」按鈕。On the "Enrolled users" page, click the "Enrol users" button.
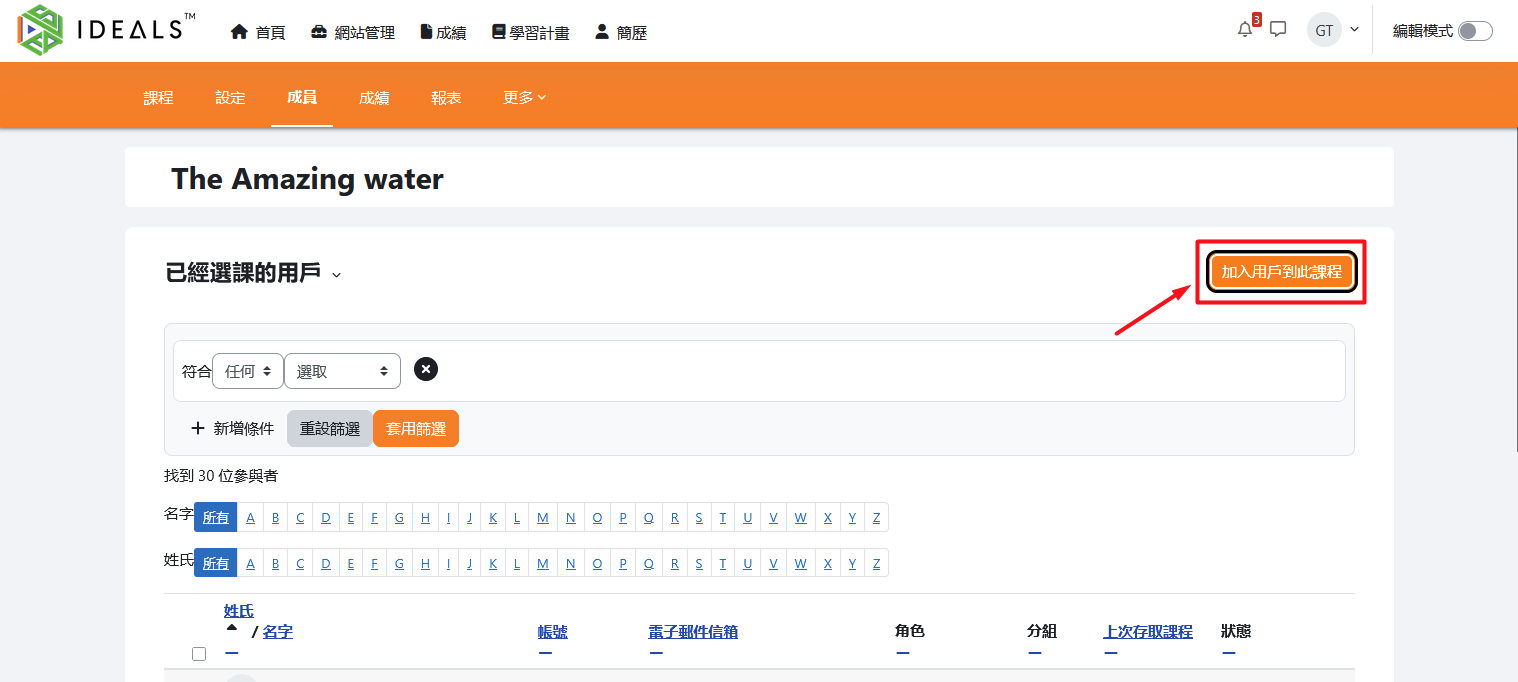
在「選課的選項」視窗內:In the "Enrolment options" window:
選擇用戶:於「選擇用戶」欄位輸入學生姓名、用戶名或電郵地址,進行搜尋並選取。Select users: In the "Select users" field, enter the student's name, username, or email address to search and select the user.選擇同期生:此選項與使用「校定班級群組選課」的效果近似,但不建議於此選擇Select cohort: This option is similar to using "Cohort sync," but it is not recommended to use this here.分配角色:於「分配角色」選擇「學生」。Assign role: In the "Assign roles" dropdown, choose "Student."
確認選擇後,點擊「將被選出的用戶和同期生加選」按鈕,即可完成加入。學生將即時成為該課程成員,角色為「學生」。After confirming your selections, click the "Enrol selected users and cohorts" button to complete the process. The students will immediately become members of the course with the "Student" role.
3.1.3 方法二:詳細手動選課(「選課方法」Method 2: Detailed Manual Enrolment ("Enrolment methods" →「手動選課」) "Manual enrolment")
在「已經選課的用戶」頁面左方選單,選擇「選課方法」。On the "Enrolled users" page, select "Enrolment methods" from the menu on the left.
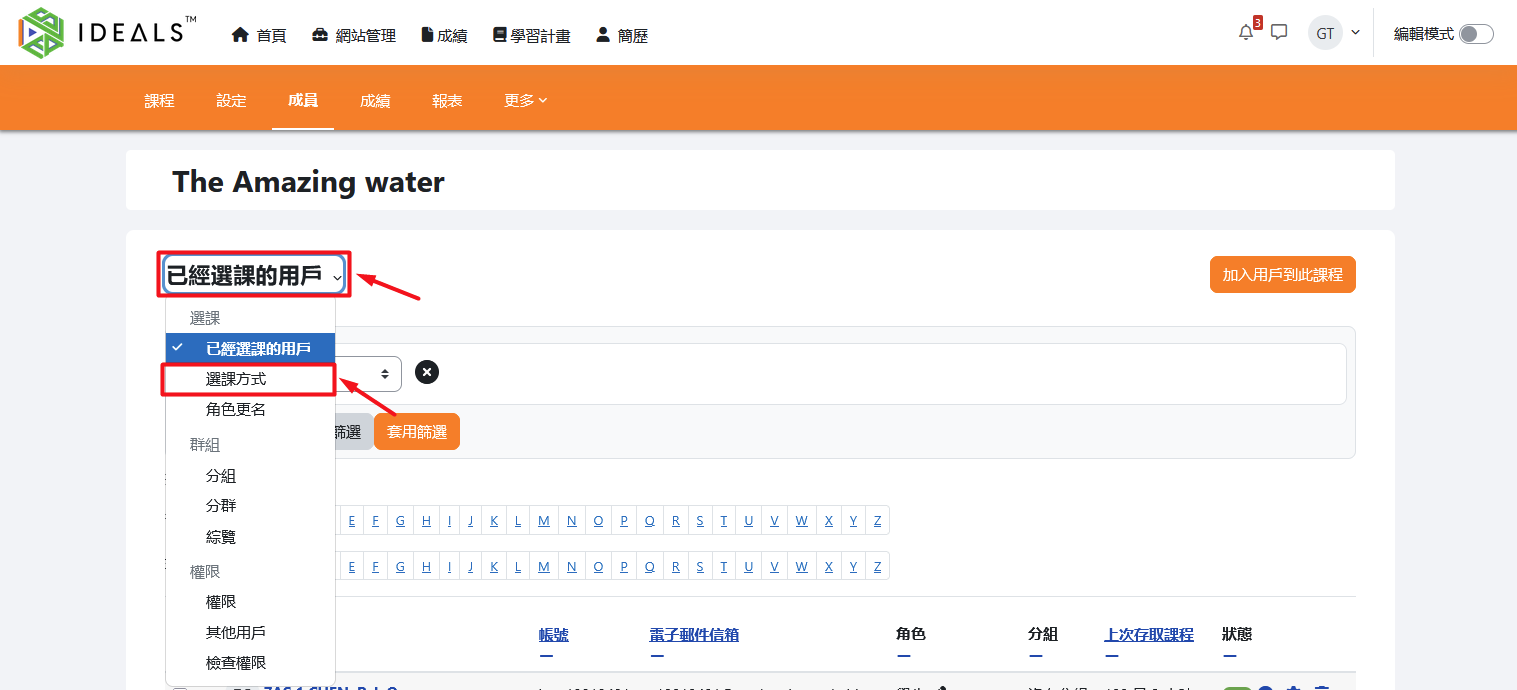
畫面會顯示各種選課方式列表(如手動選課、訪客瀏覽、自行選課〔學生〕等)。在「手動選課」列右方,點擊「管理」圖示(頭上有加號的👤)。A list of available enrolment methods will be displayed (such as Manual enrolment, Guest access, Self-enrolment (Student), etc.). On the row for "Manual enrolment," click the "Manage" icon (the icon of a person with a plus sign 👤) on the right.
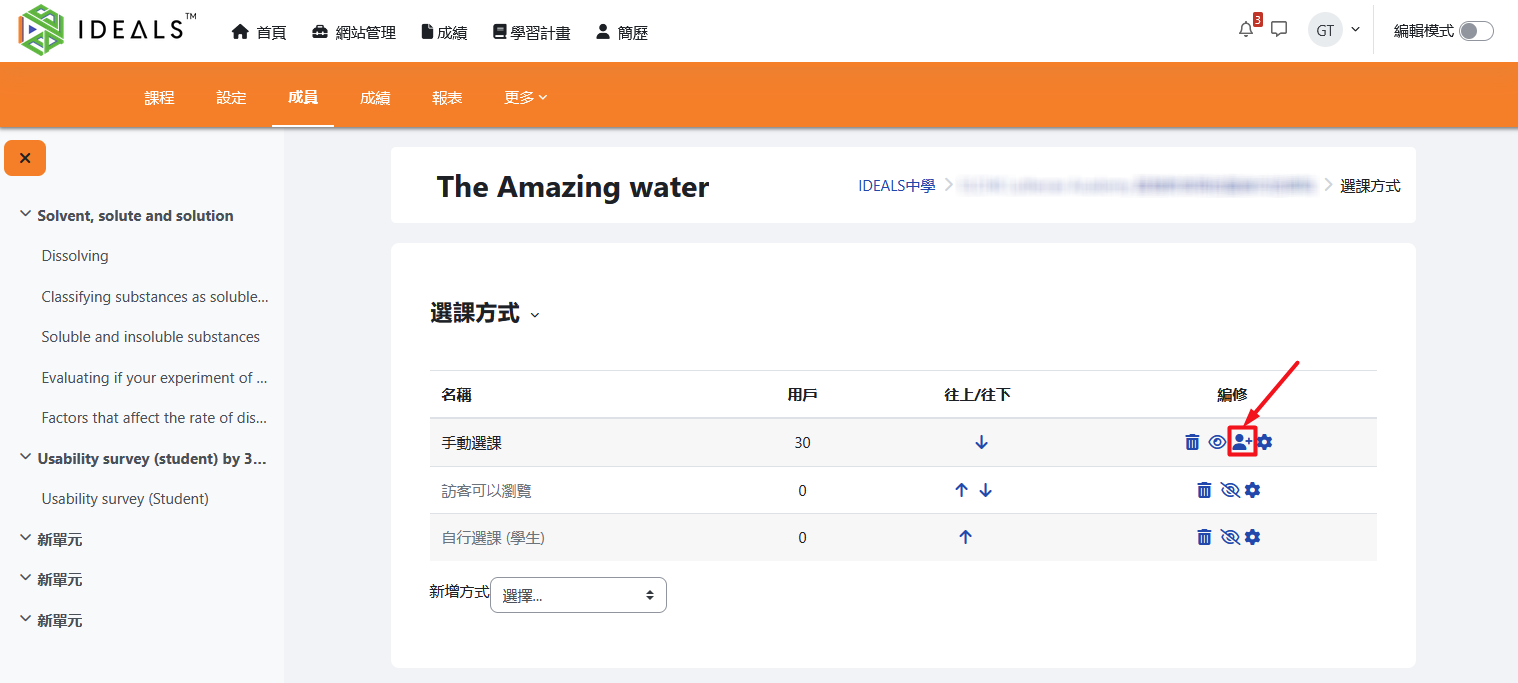
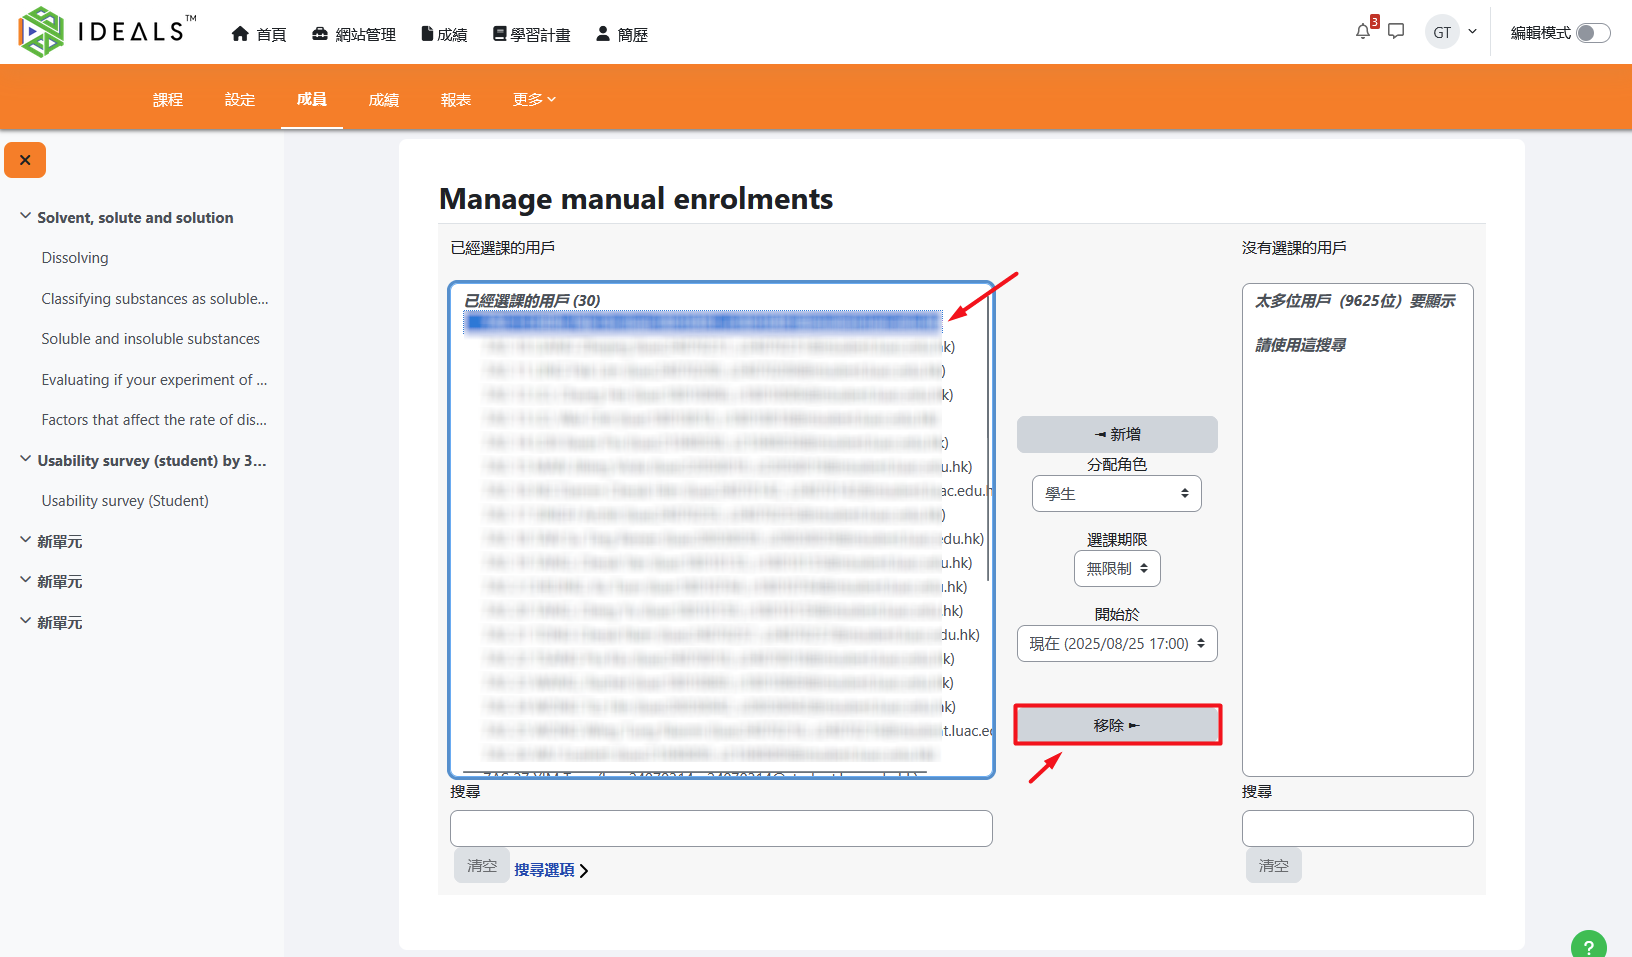
進入「管理手動選課」畫面後,右方可搜尋用戶,用姓名、用戶名或電郵地址找到目標學生後,選擇「分配角色」After entering the "Manage manual enrolments" screen, you can search for users on the right by entering their name, username, or email address to find the target student. Then, select the "Assign roles" option (預設為「學生」default is "Student"),並點擊「新增」將其加到左方「已經選課的用戶」欄。, and click "Add" to move them to the "Enrolled users" list on the left.

完成後,選課的學生就會加入課程。Once completed, the enrolled student will be added to the course.
如果往後想移除某位用戶的手動選課,請再進入該課程「管理手動選課」畫面,在左方「已經選課的用戶」欄選擇目標用戶,再按「移除」將其加到左方「沒有選課的用戶」欄便可。If you wish to remove a user's manual enrolment in the future, go to the "Manage manual enrolments" screen for that course. In the "Enrolled users" list on the left, select the target user, then click "Remove" to move them to the "Not enrolled users" list on the left.