
1.1 Create a course
After logging into iLAP and entering the homepage, first select any course category to serve as the "parent category" for the new course.
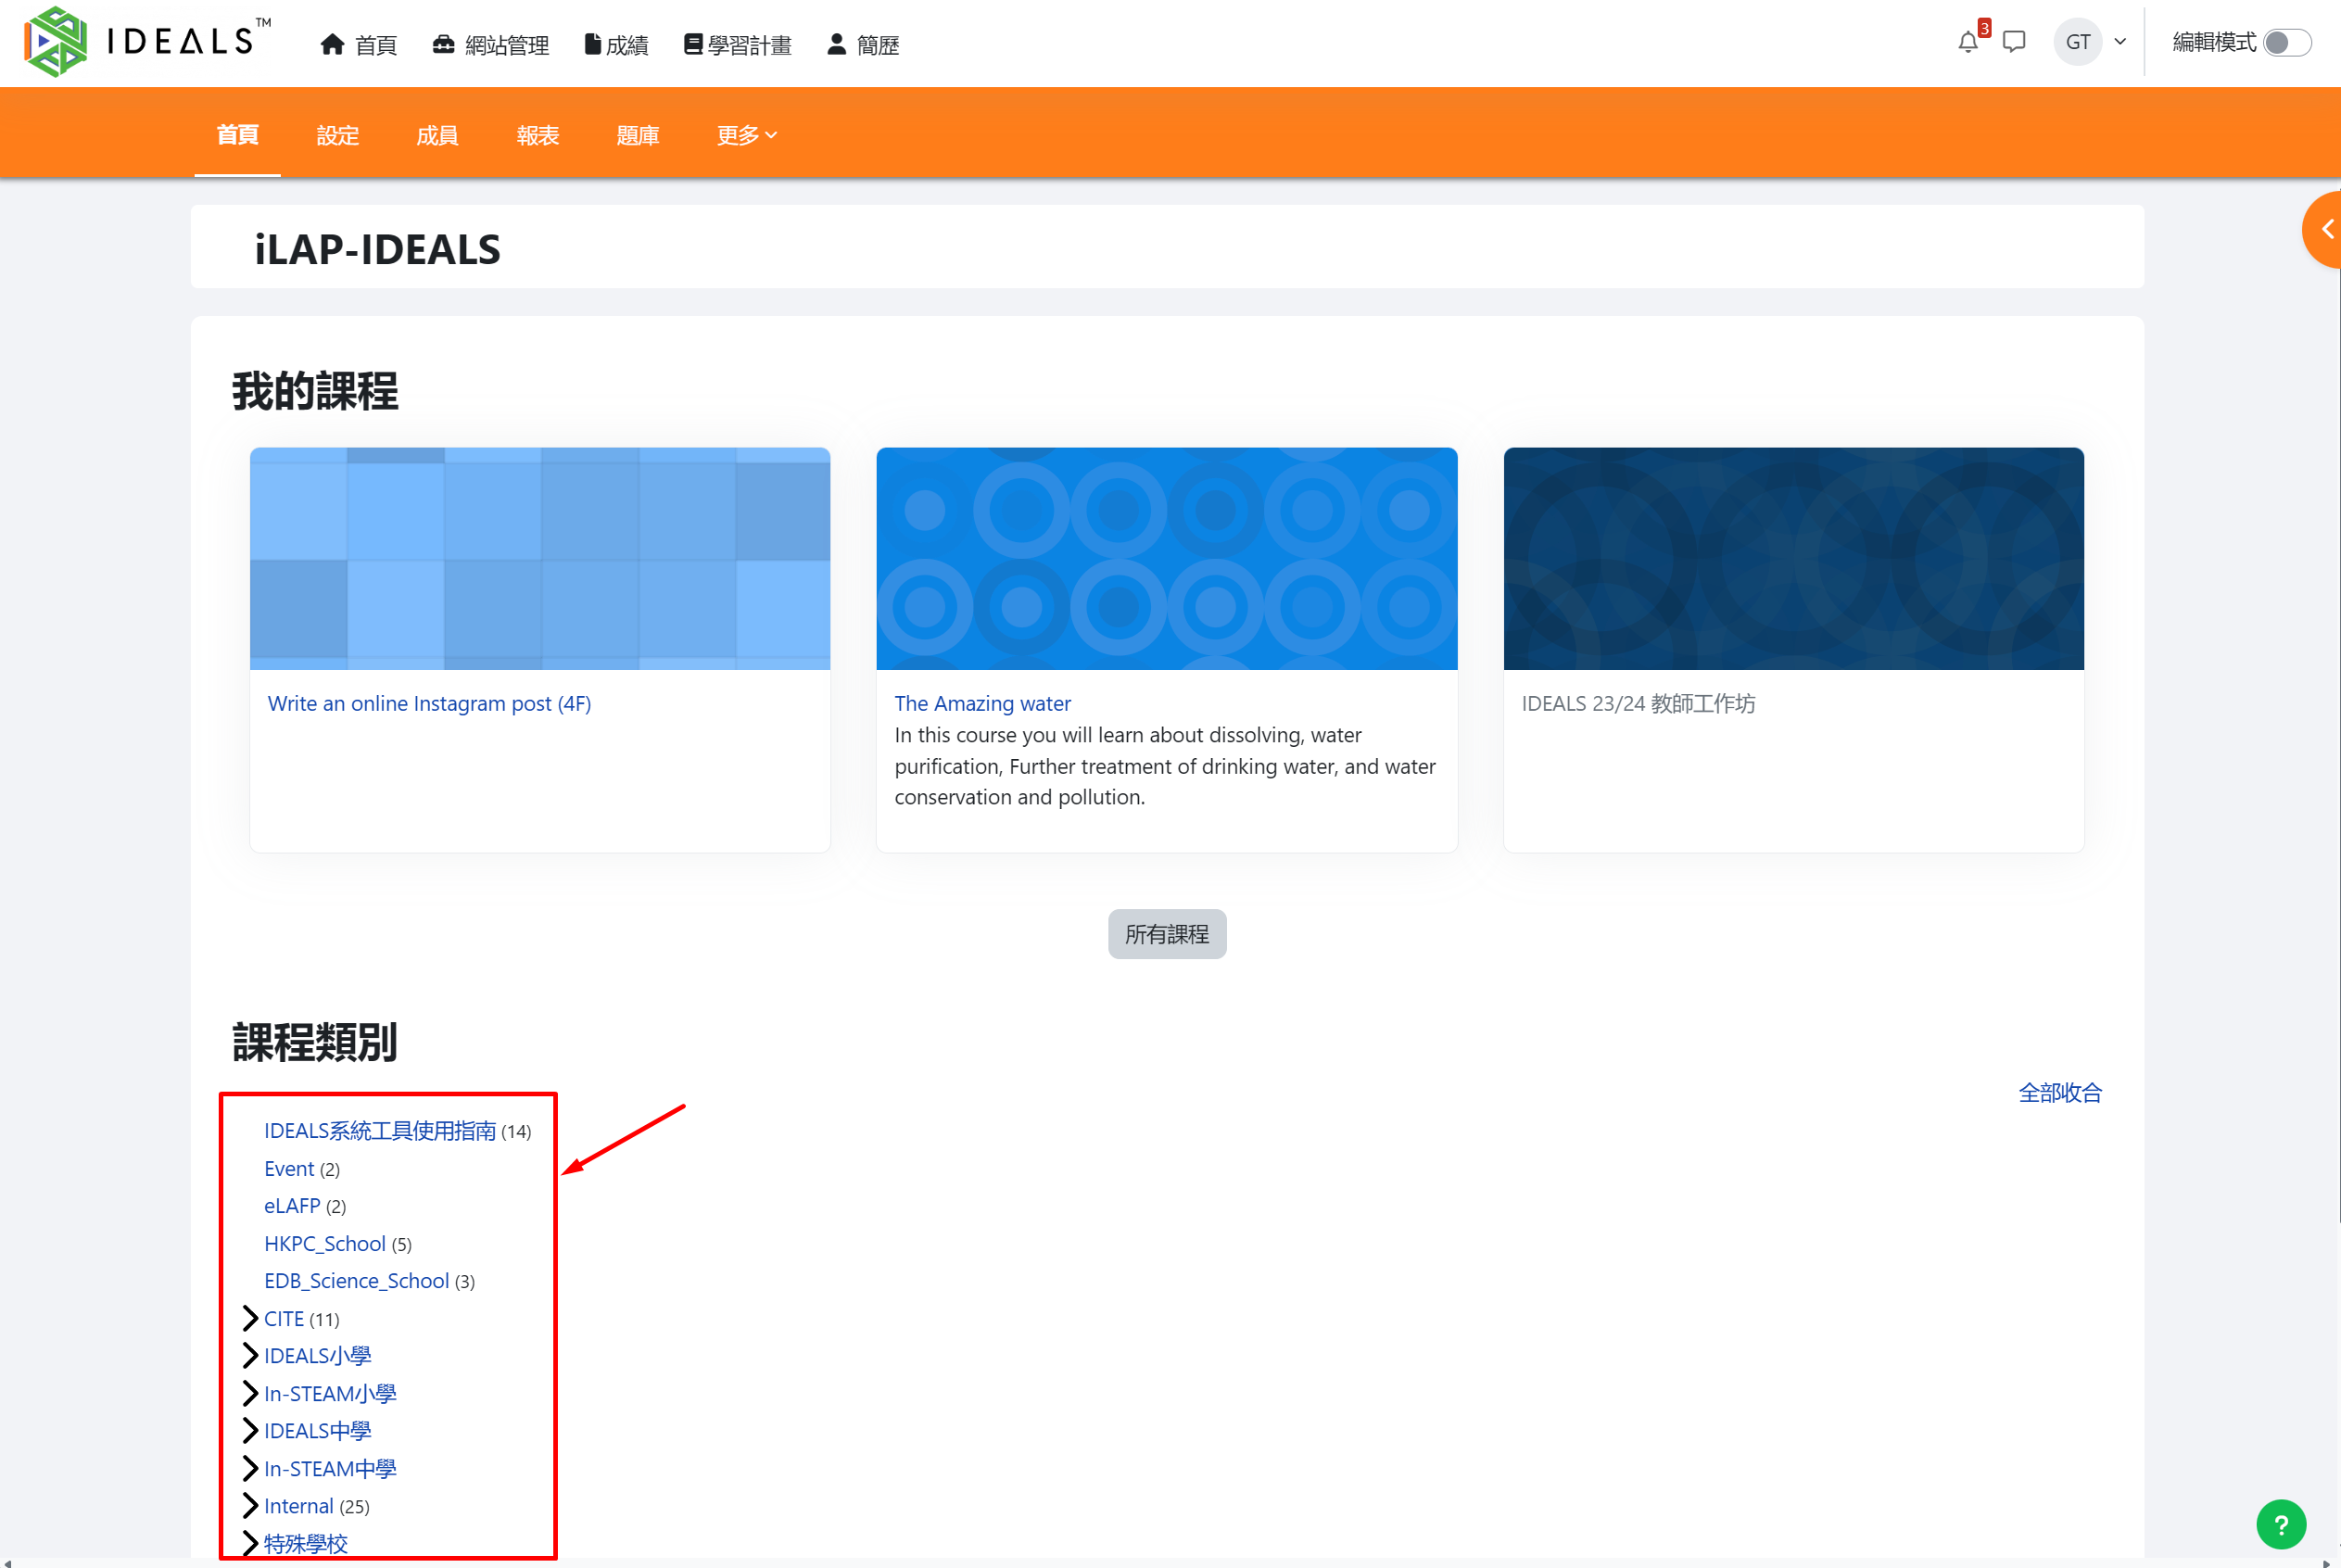
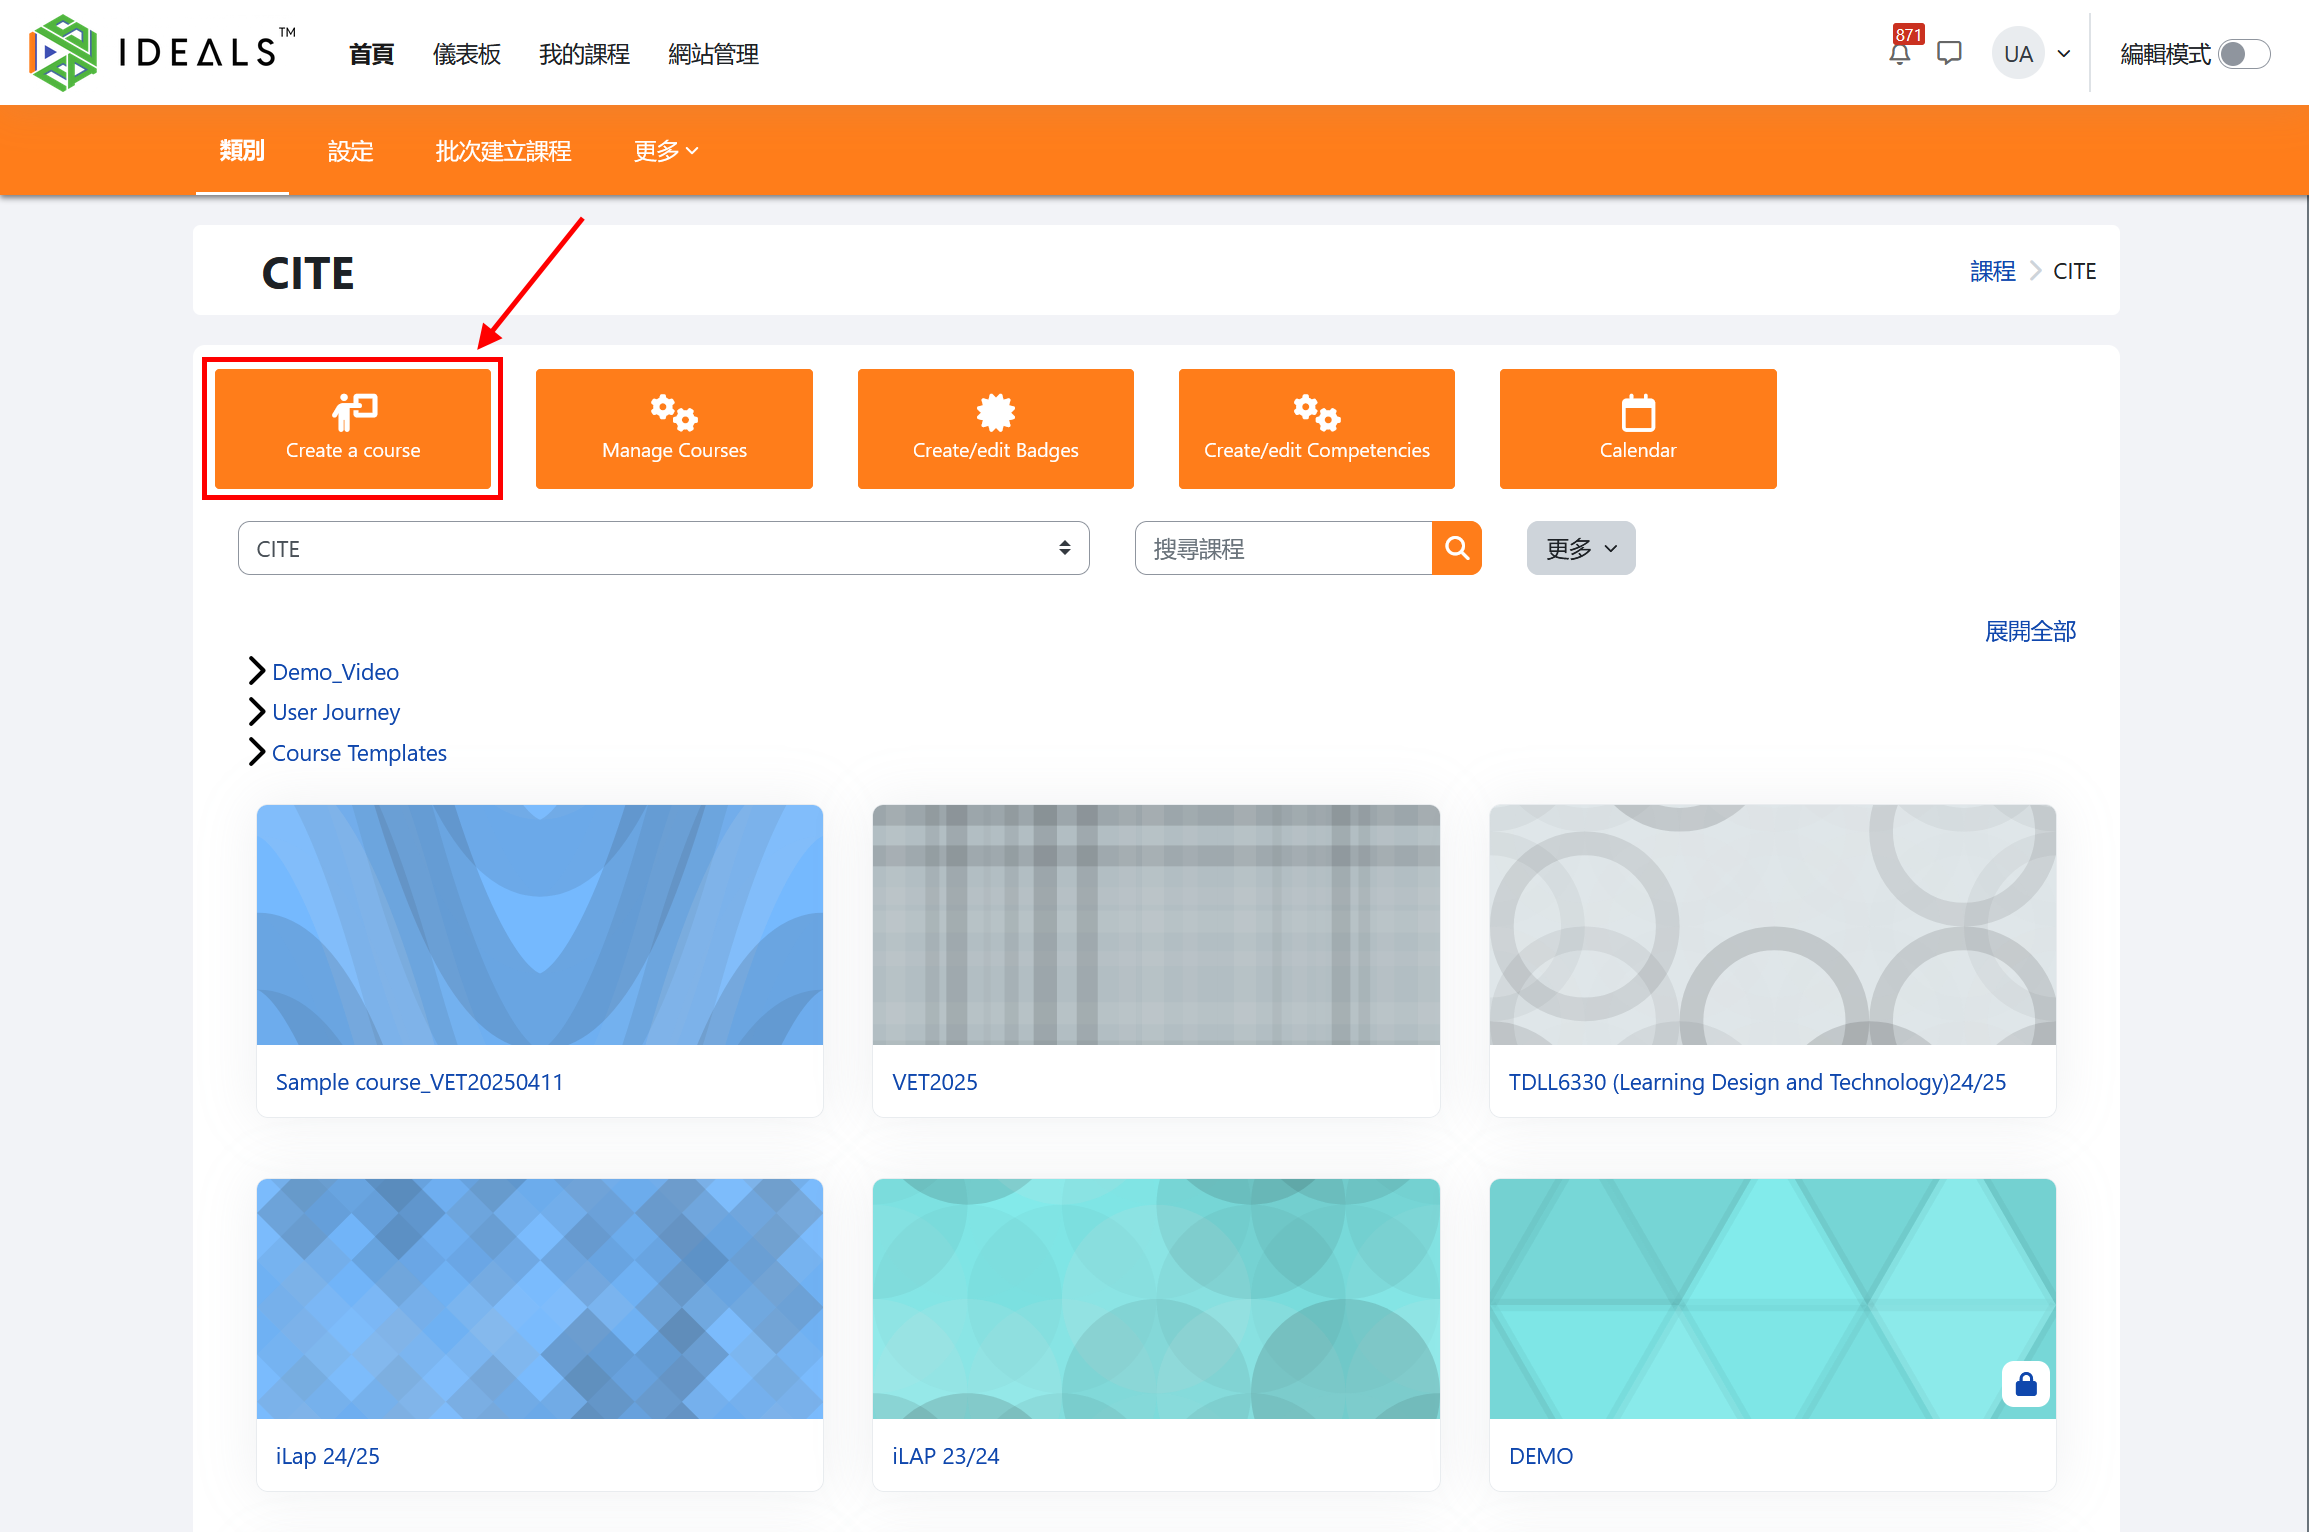
After entering the course category, click the "Create a course" button at the top left.
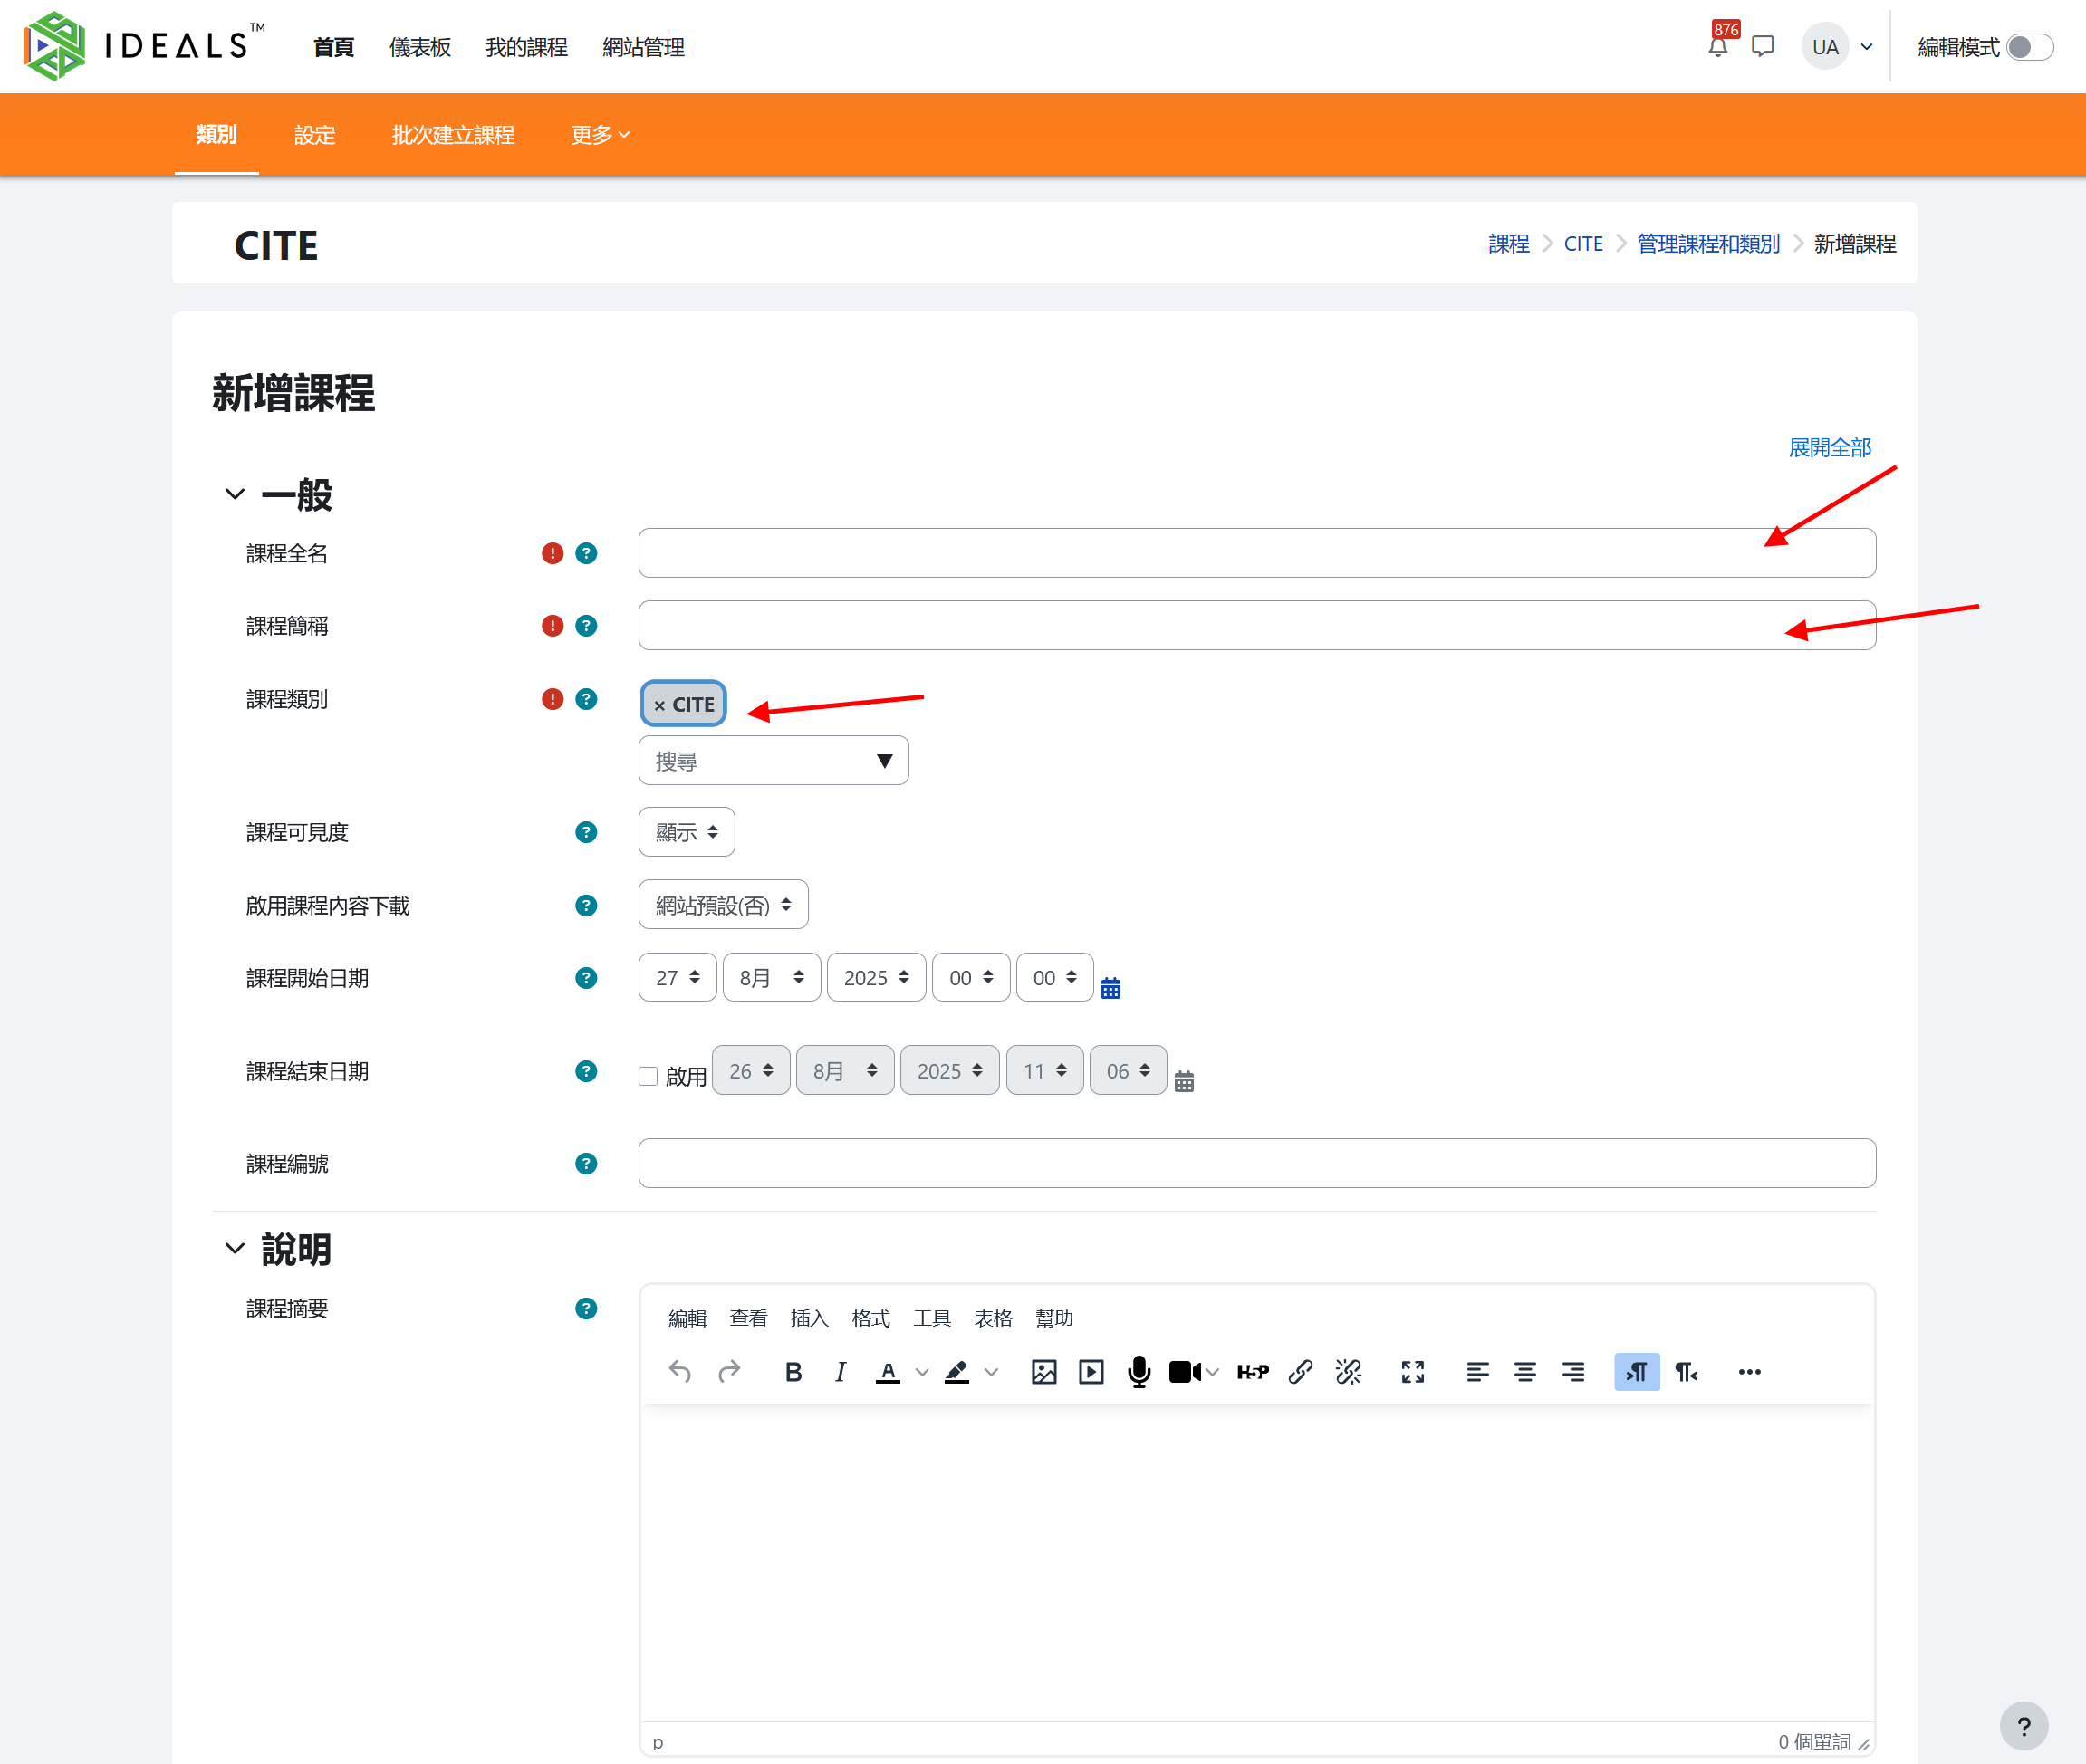
On the "Add a new course" form, fill in the basic course information. Only three fields are required:
- Course full name: The detailed name of the course (e.g., S1 Robotics Design 2025-2026)
- Course short name: Used when interface space is limited, such as in page paths, and must be unique within the platform (e.g., Robotics_2526)
- Course category: (Already selected)
All other settings are optional. The following explains some commonly used settings:
- Course visibility: If you want to hide the course from students initially, you can select "Hide".
- Course start/end date: If you want students to only access the course within a specific period, you can set a time range.
- Course summary: You can enter a brief course introduction to let students and teachers know the details of the course.
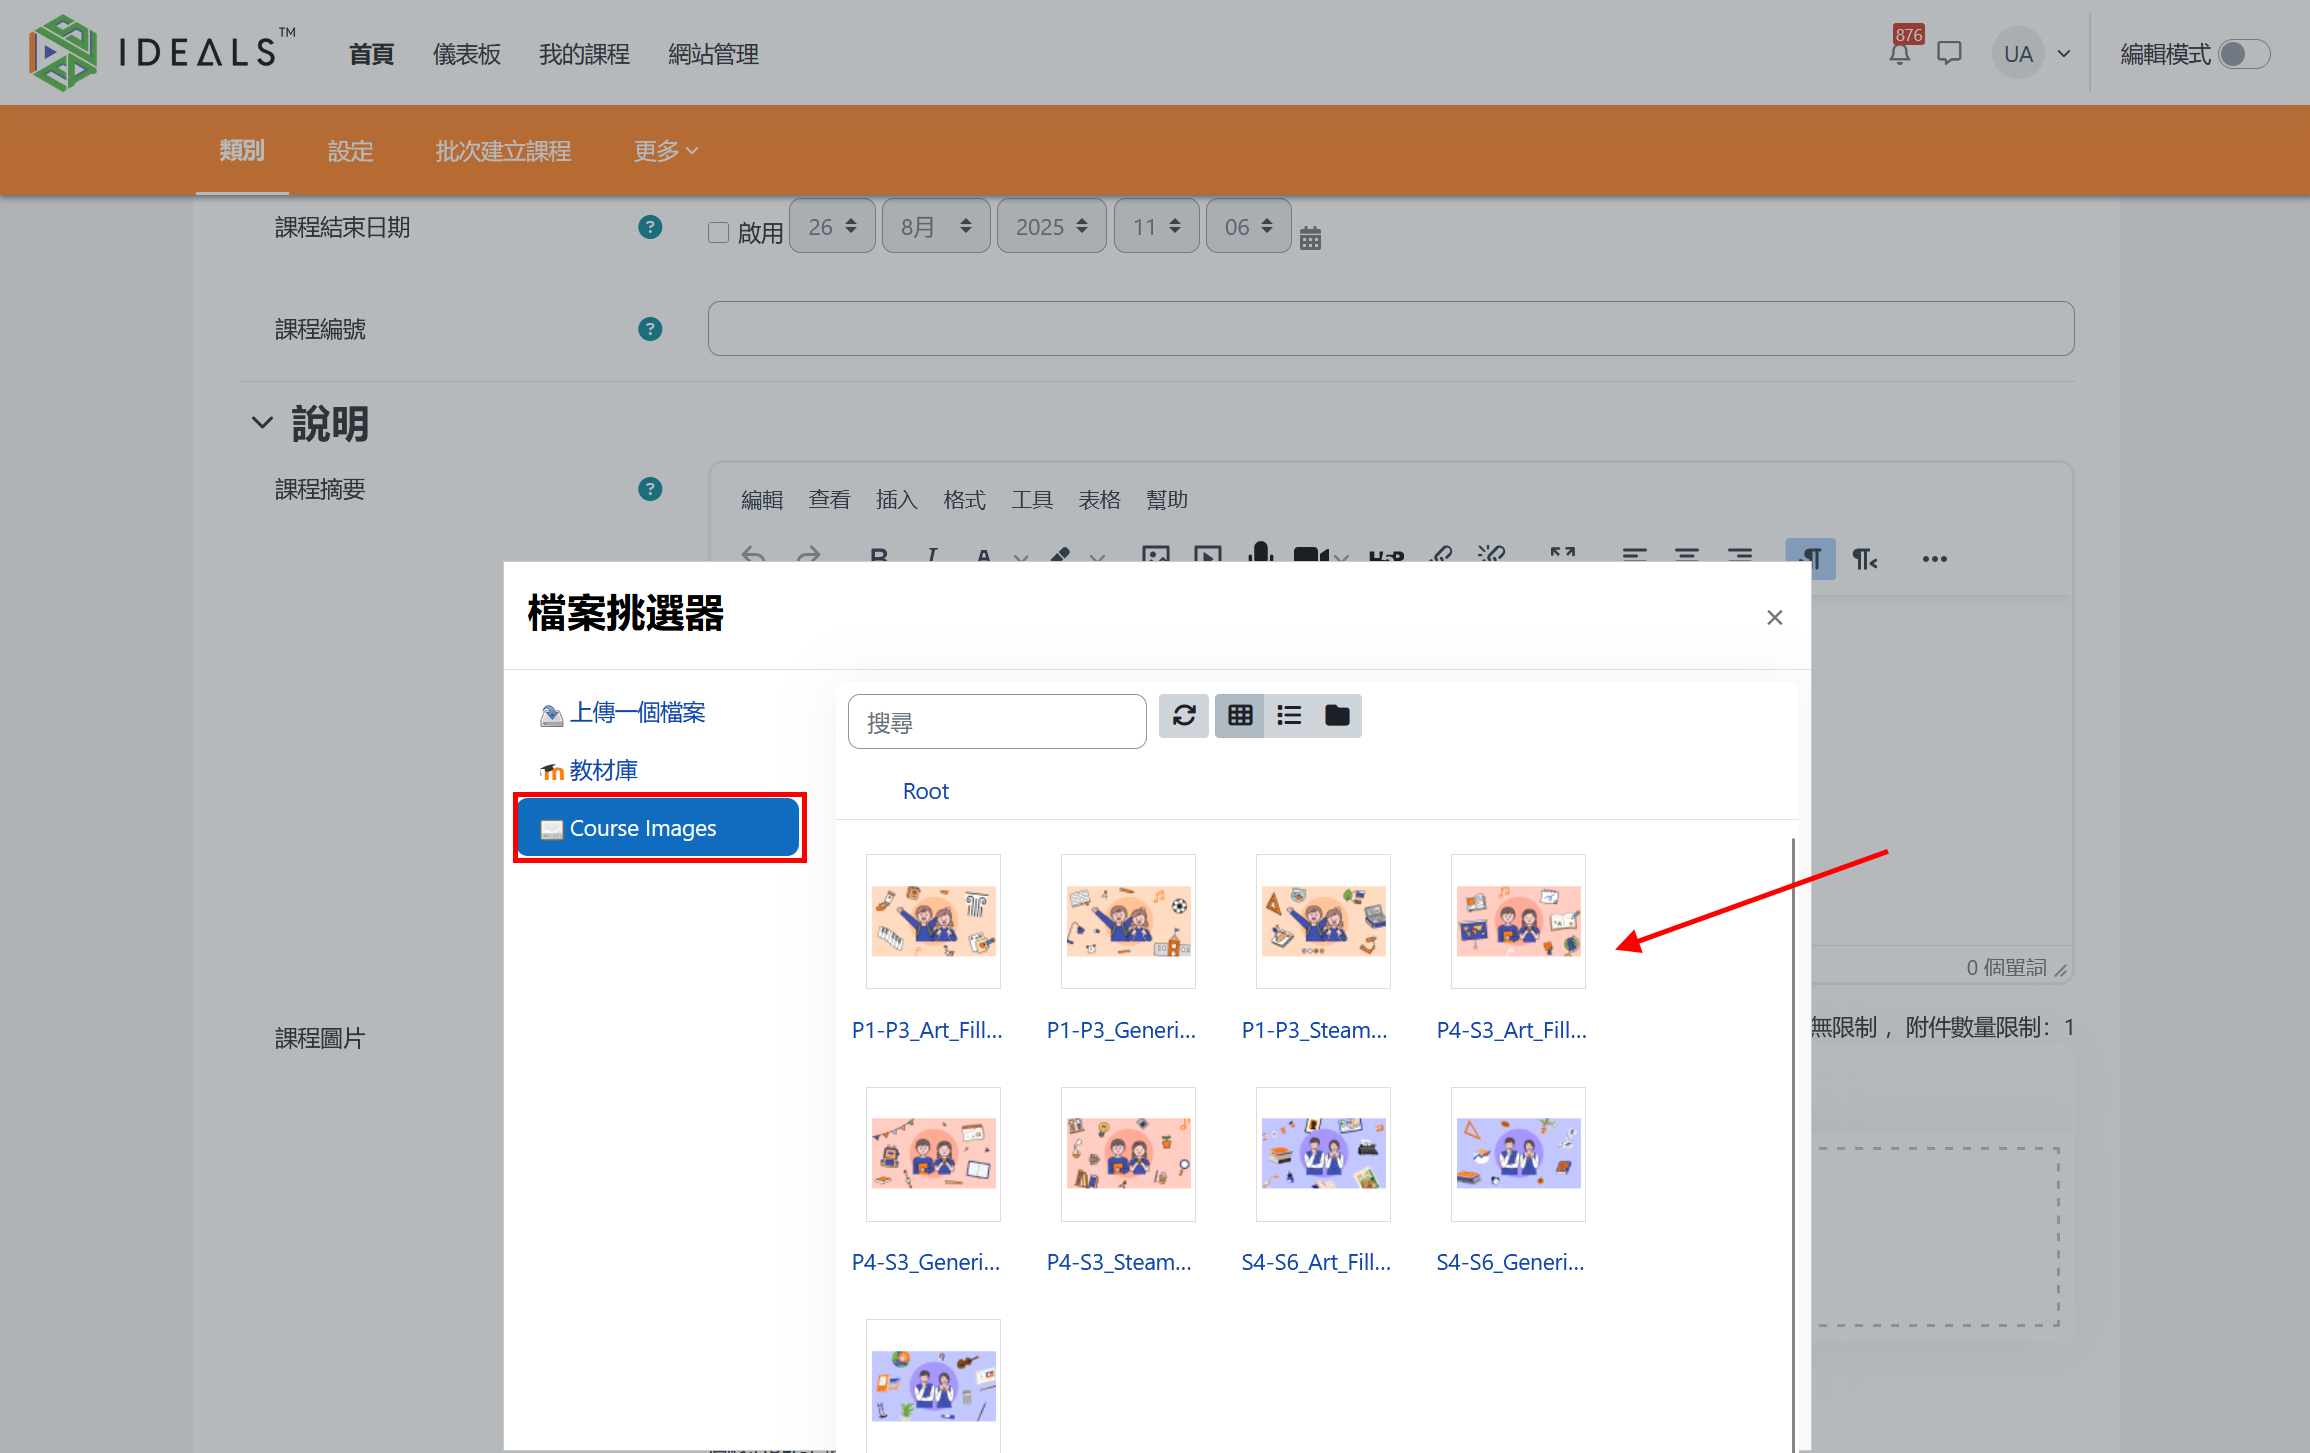
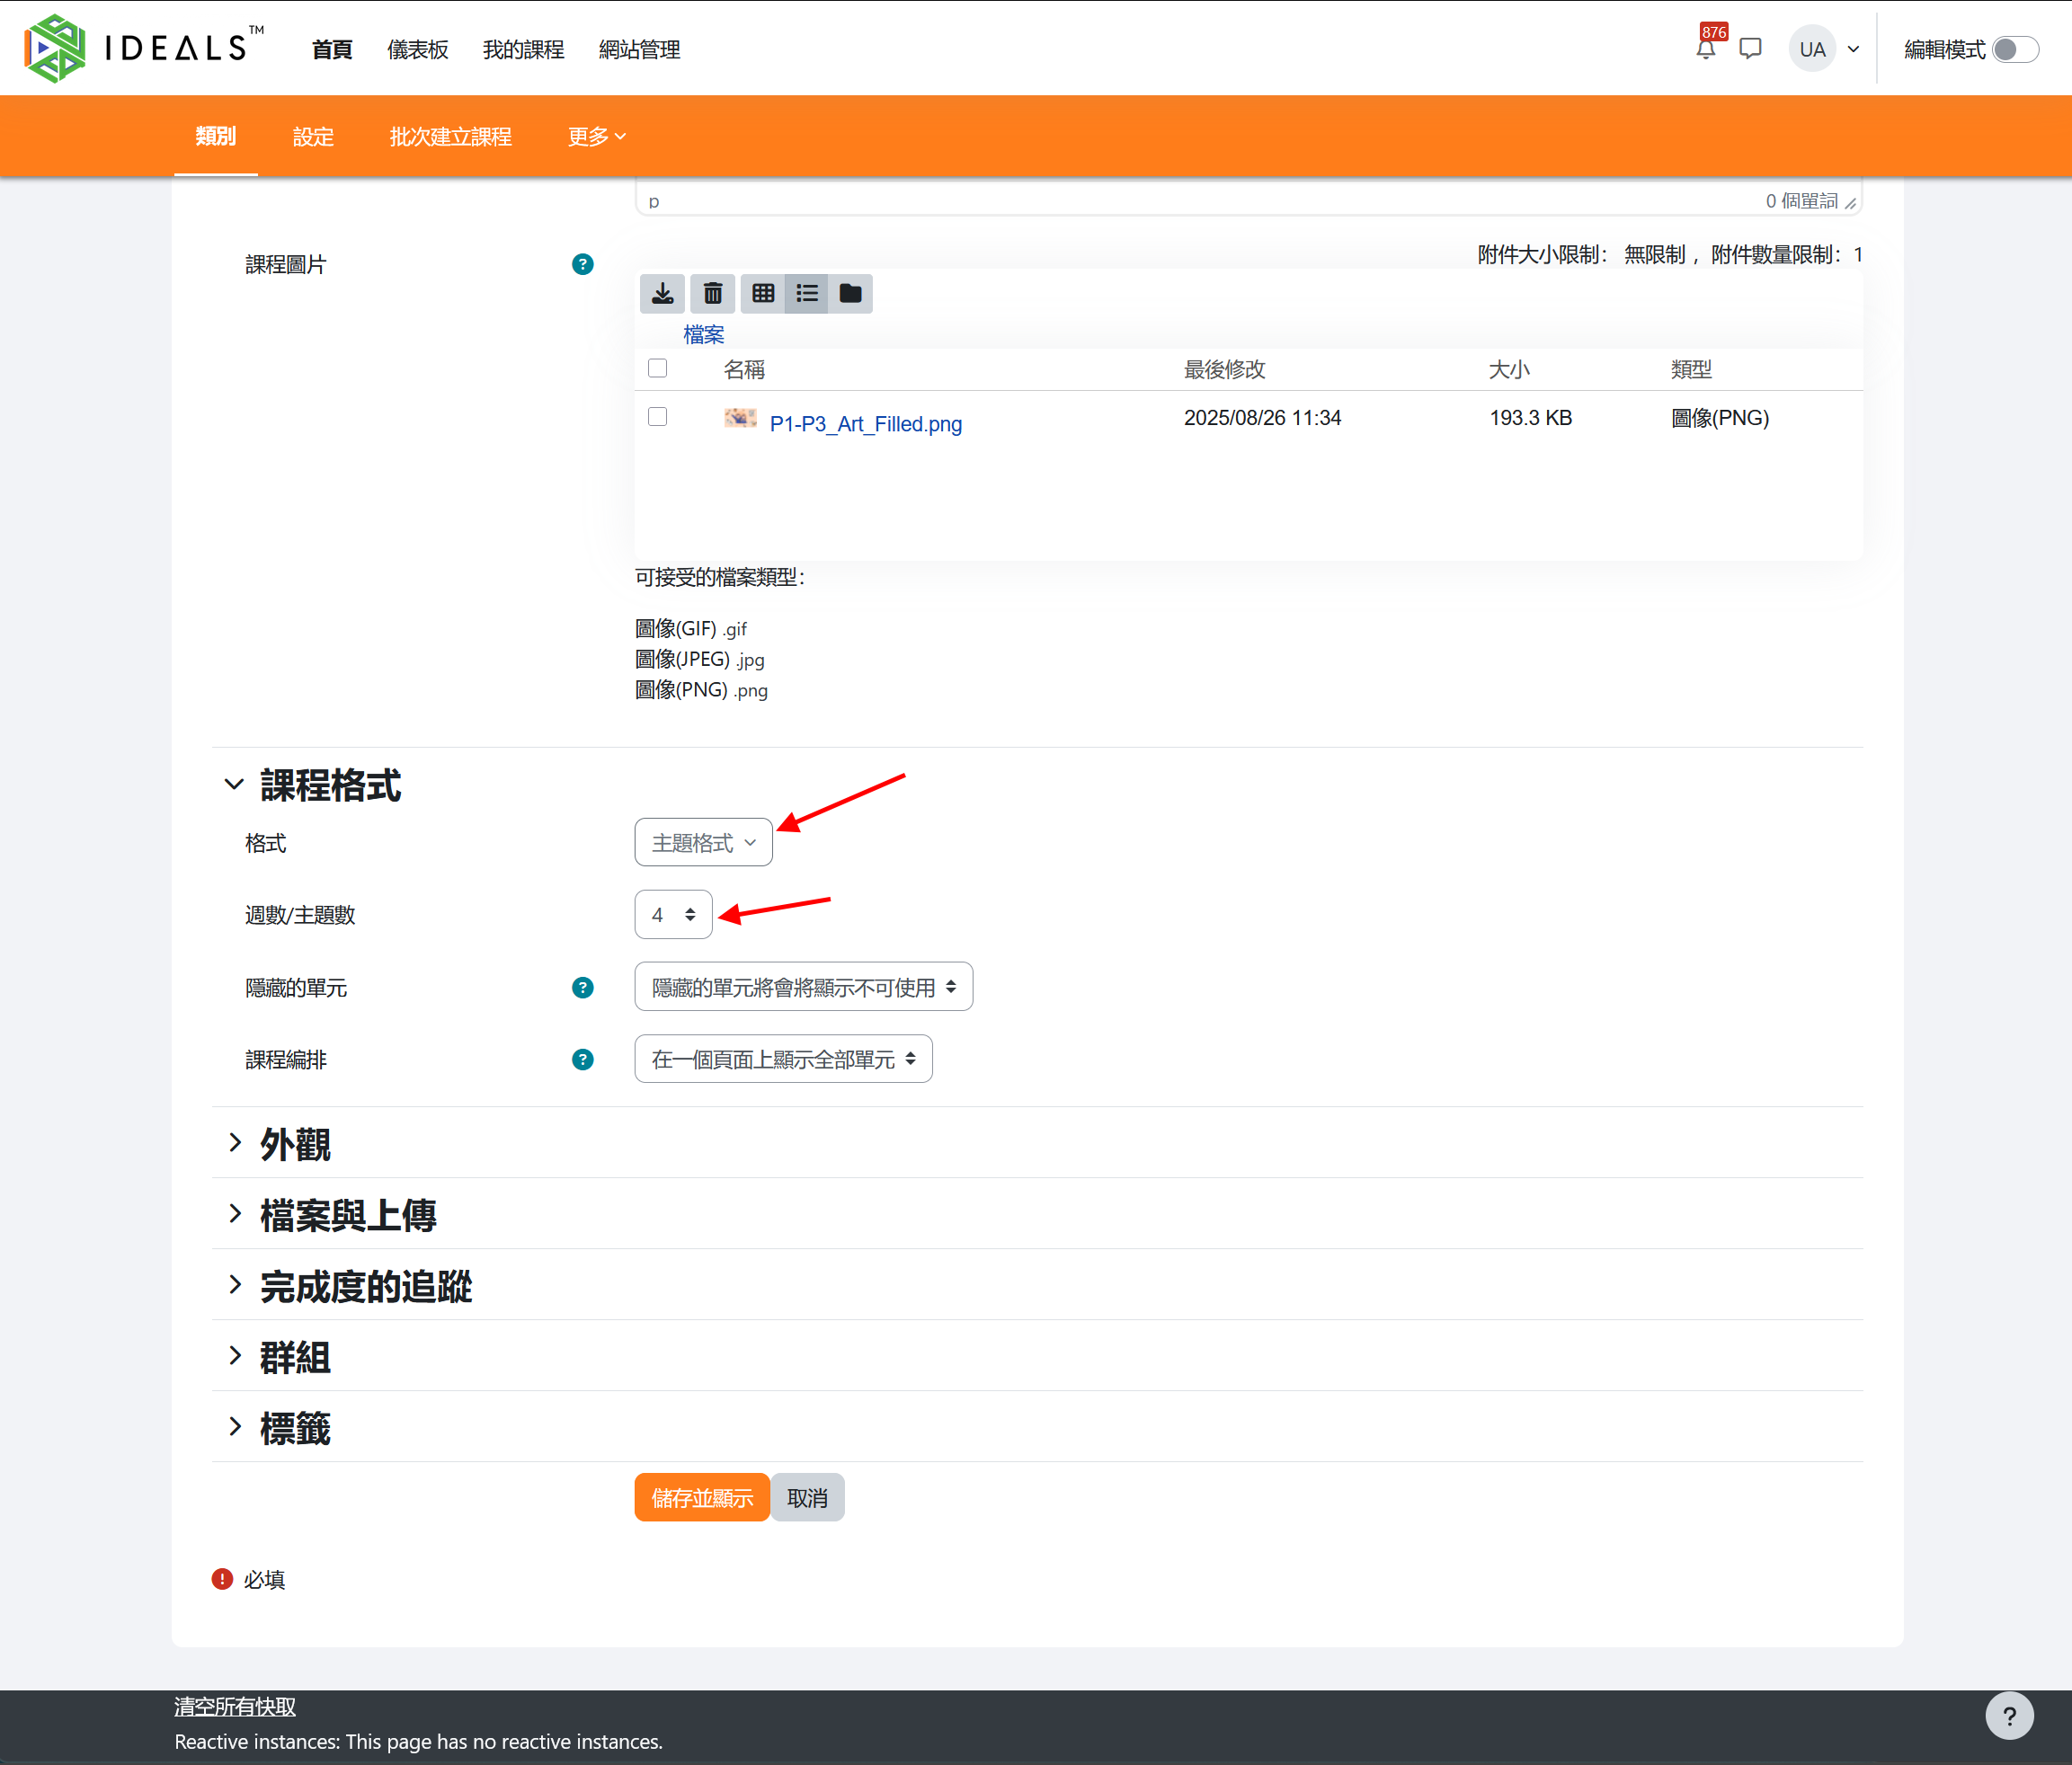
- 課程圖片:將顯示於我的課程和首頁的可選課程作為裝飾,你可以自行上載一張圖片,只需將圖片拖放到虛線框內便可。
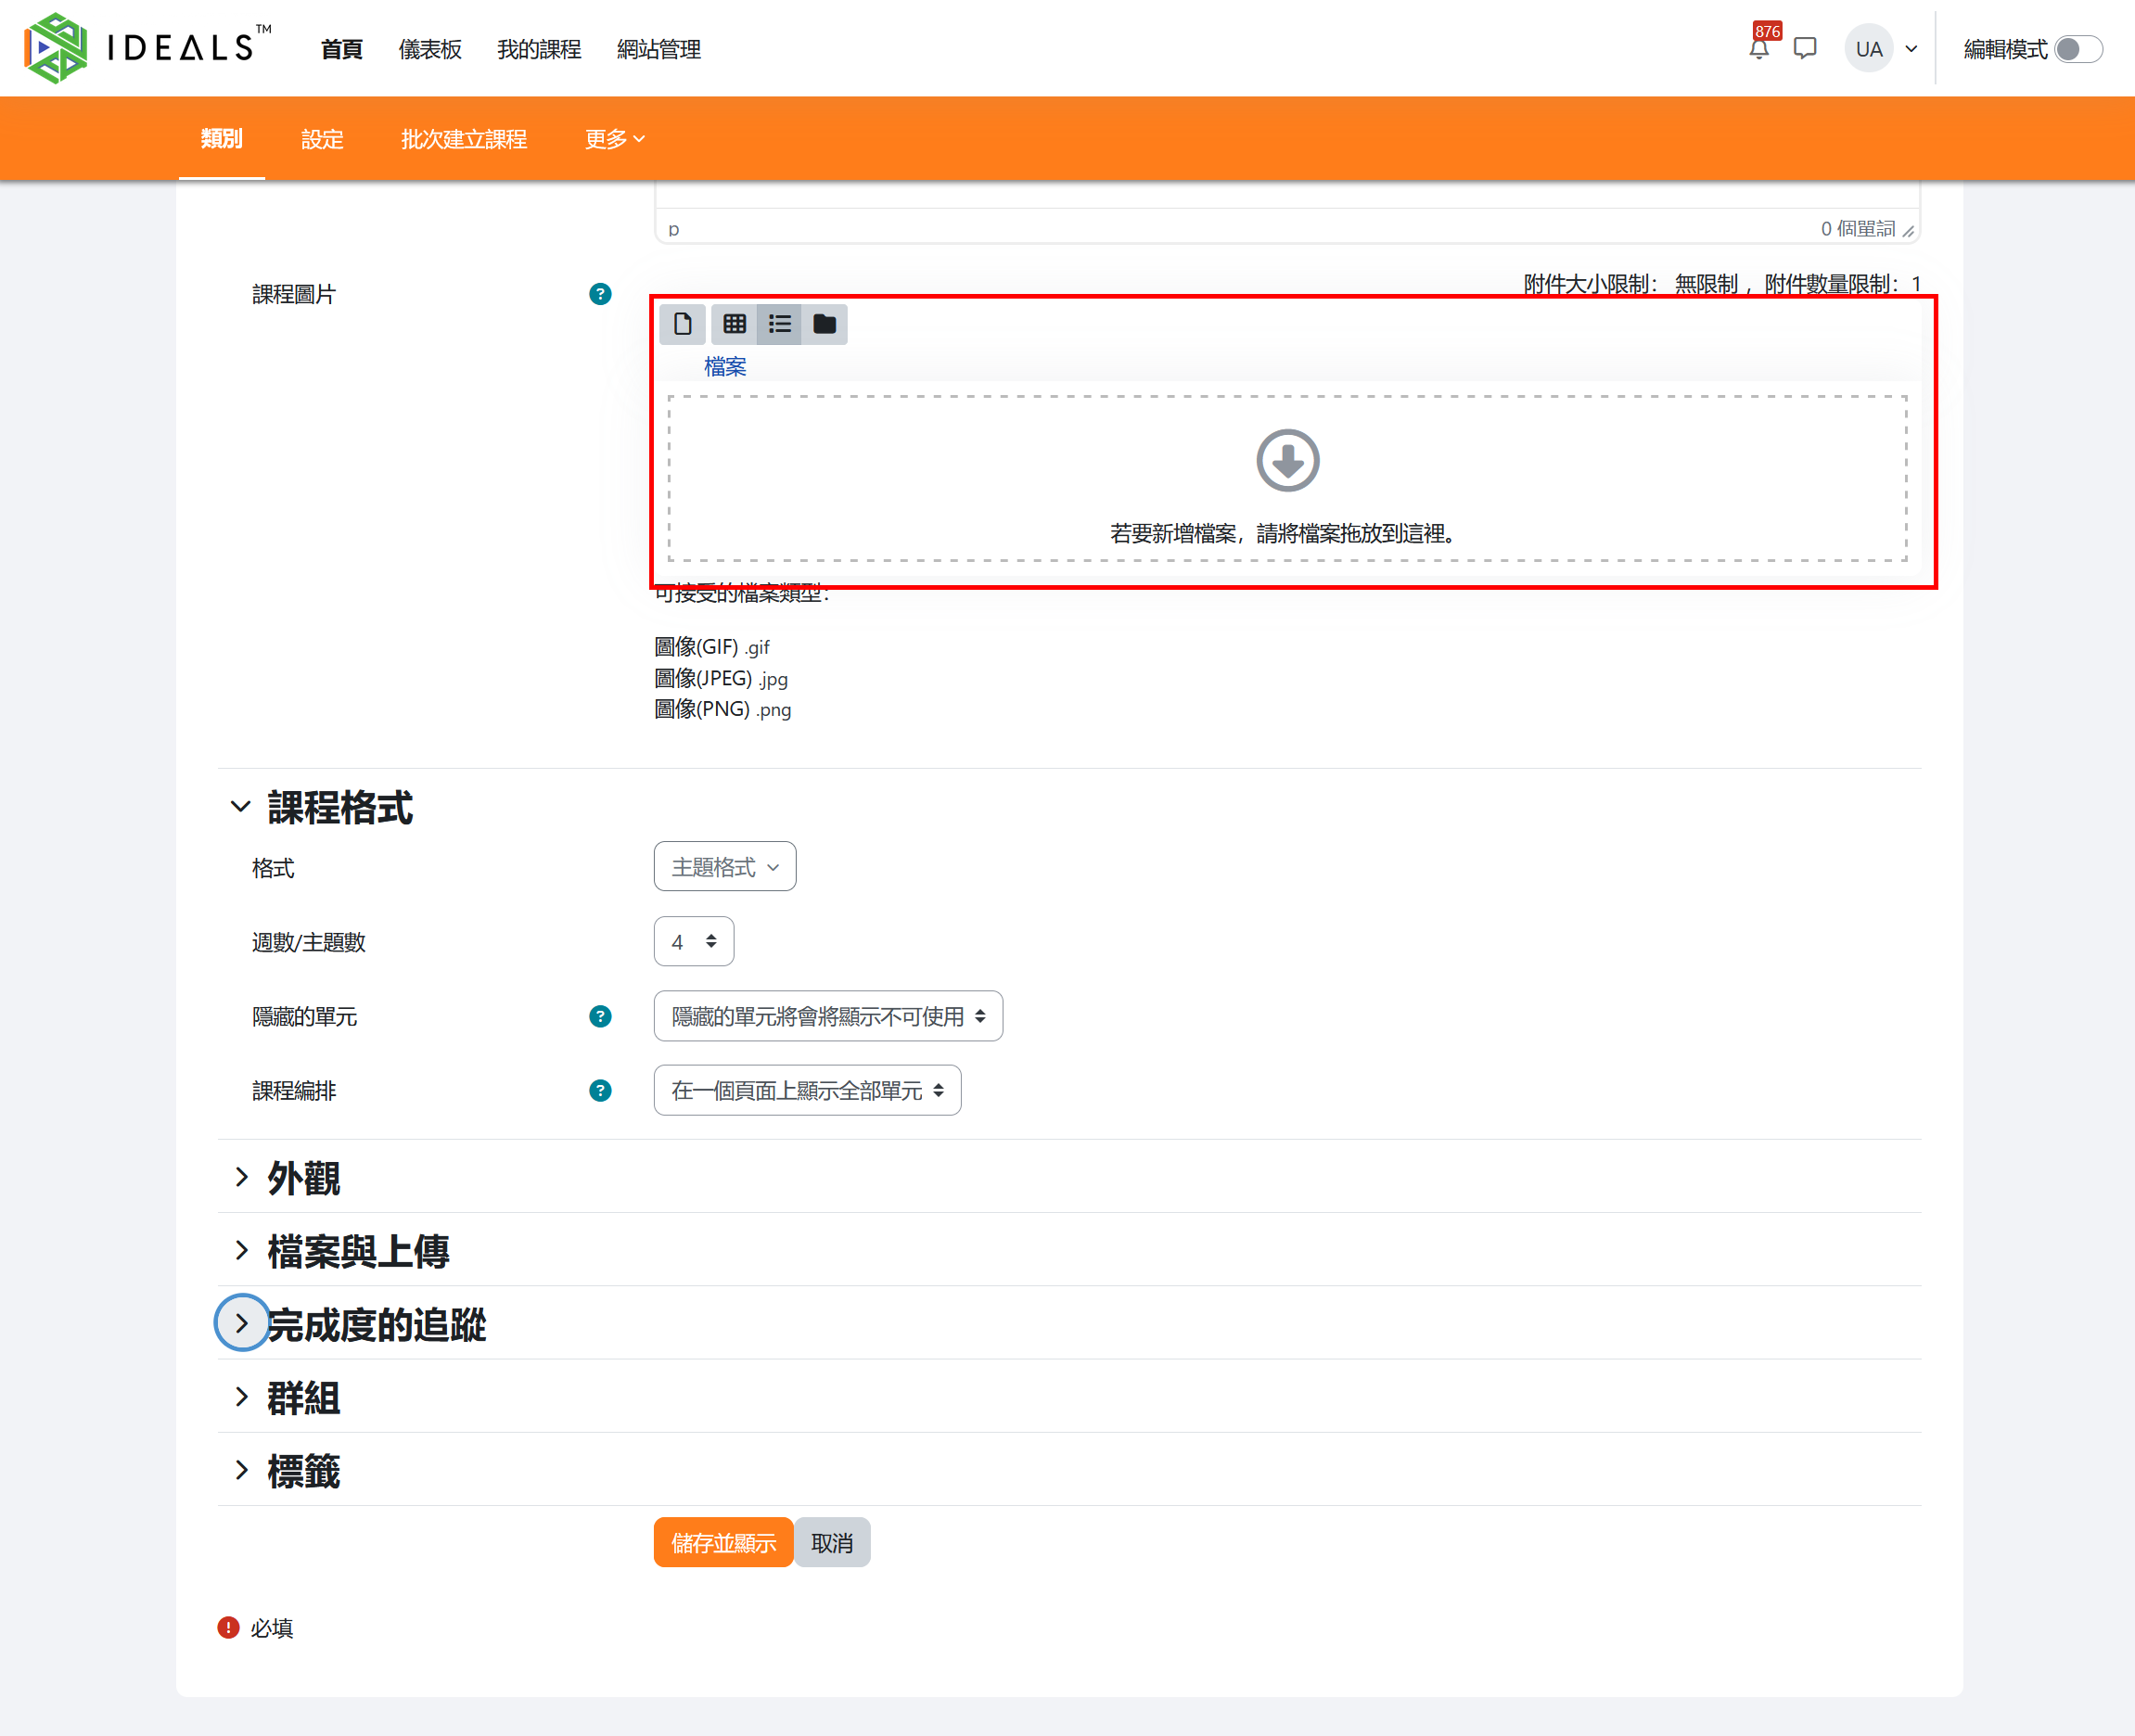
你亦可點擊虛線框打開「檔案選擇器」,再點擊左方的"Course Images",裡面提供了一些預設圖片供用戶自由使用。
- 課程格式:預設的「主題格式」應該適合在大部份的情況下使用,你可能會想增加或減少「主題數」(預設4),這數字影響課程版面中央有多少區塊給你編排活動和資源。
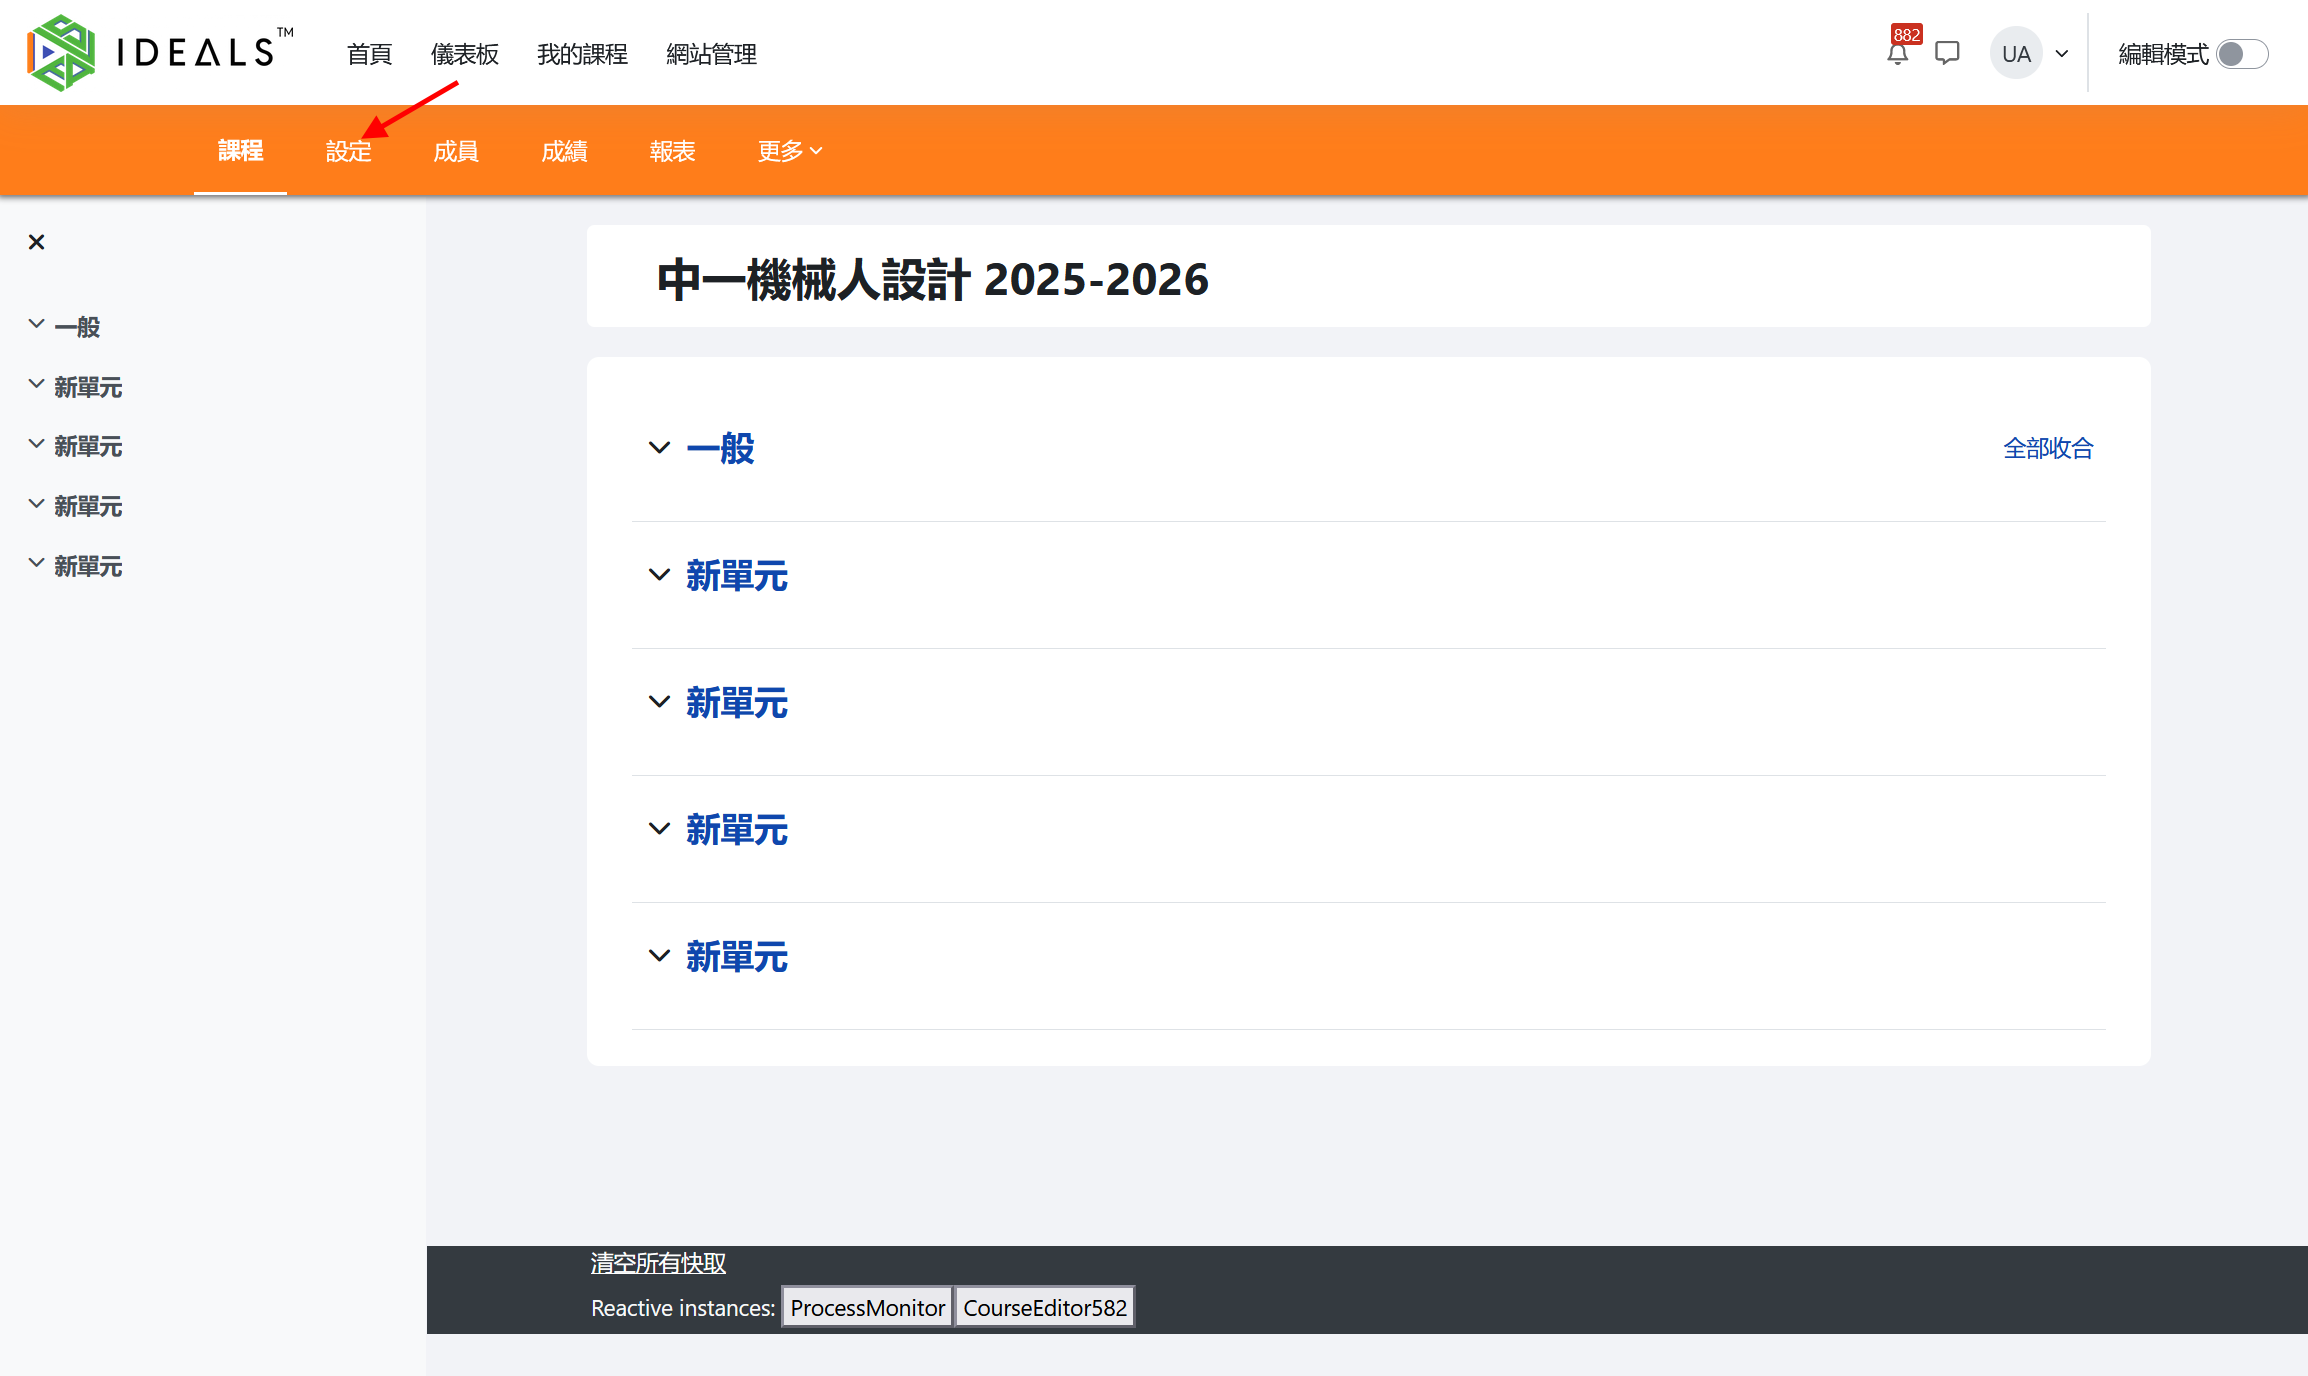
完成設定後,請點選「儲存並顯示」右按鈕,即可檢視課程頁面。老師可隨時點擊「設定」進行修改。
下一步你可能會想將學生加入剛新增的課程,請參考管理學生選課指南。